Showing posts with label organic seeds. Show all posts

Friday, November 27, 2015

12 Healing Herbs You Need To Grow In Your Medicinal Garden

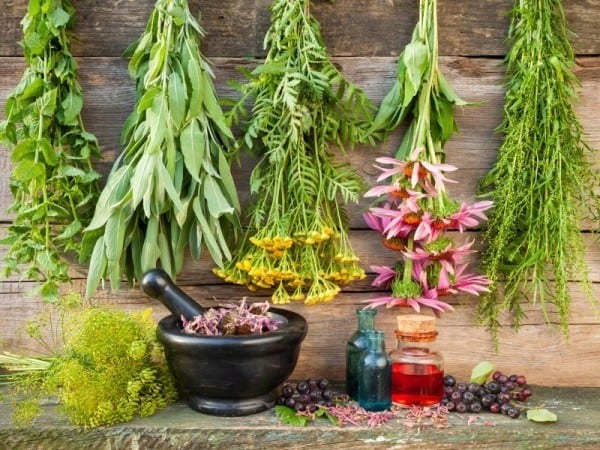
Medicinal plants grown in your own gardens can reduce your dependence on drugs, if not completely eliminate them. But growing random herbs with medicinal properties doesn’t help.

It is a common myth that all herbal preparations are safe by virtue of being natural. This is far from true. A typical example is foxglove or Digitalis purpurea. It has a positive effect on heart function, with the cardiac drug digitalin extracted from the plant. However, ingesting any part of the plant can induce nausea and vomiting, and can even lead to total collapse from digitalis intoxication and death.

Accessibility is another issue, as in the case of rosy periwinkle Catharanthus roseus/Vinca rosea from which anticancer drugs vinblastine and vincristine are obtained. You don’t benefit from growing this plant unless you are an experienced herbalist who can put it to good use. Otherwise, it will just remain a display specimen in your garden. You need to grow plants whose goodness you can access through simple preparations such as teas and infusions, poultices and powders.  

Some medicinal plants are to be used for treating specific ailments, while others have a generalized positive effect on our health when used regularly. Many herbs belonging to the latter group have found their way into our culinary scene as flavoring agents. Your medicinal garden should ideally have such plants that have practical uses for the common man besides being easy to grow.

Here’s a practical guide to a few of the accessible herbs that have stood the test of time:


1. Aloe vera

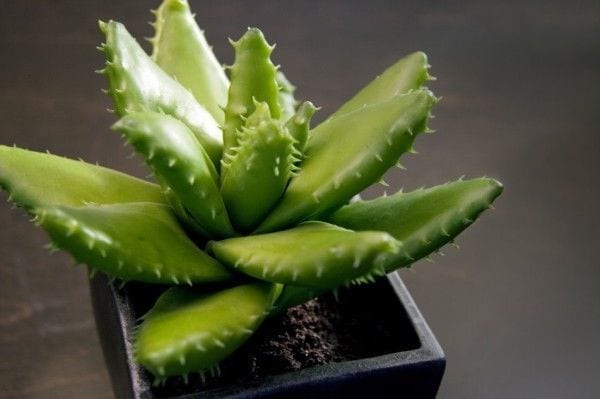
Aloe vera is well known as a skin-friendly plant. It is one medicinal plant people really make use of, since it is generally safe and requires no processing before use. It is a must-have in every garden whether you grow it in pots or in the ground.

Aloe vera plants grow well in a sunny location in warmer areas where there is not much danger of killer frosts. Being a succulent, this drought resistant plant requires very little care and thrives in poor soil. It suckers freely, so you can start with just one or two plants sourced from a reliable supplier. There are several aloes around; not all of them are edible or have the medicinal properties attributed to Aloe vera.

The jelly-like, colorless pulp of mature leaves can be applied to minor cuts and burns and to dry, inflamed, or damaged skin due to eczema or other skin conditions. It is an excellent moisturizer with anti-inflammatory and mild antimicrobial effect. The leaf pulp can be eaten too. Regular use can prevent constipation and relieve other digestive problems, including ulcerative colitis and irritable bowel syndrome.

2. Peppermint (Mentha × piperita)

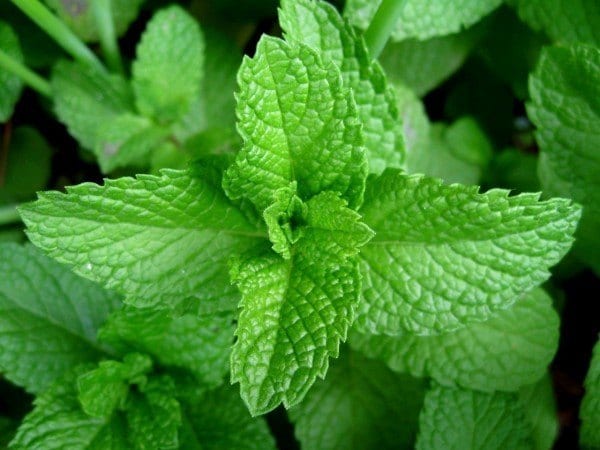
This natural hybrid of spearmint and watermint is widely use in dental hygiene products, mouth fresheners, soothing balms and candies. Quite possibly the oldest medicinal herb to be used by man, there’s evidence that peppermint has been used for thousands of years. Grow it in a part of the garden where the plants are assured of water and give it plenty of room to spread.

Sip a tea made of a handful of peppermint leaves to calm stomach upsets and relieve pain and discomfort due to gas. Carry a few sprigs of peppermint when you travel.  Sniffing on it every now and then will prevent nausea and vomiting associated with motion sickness.

The active ingredient menthol found in abundance in peppermint, as well as in many other aromatic members of the mint family, has a cooling effect on the skin. Make a poultice of the leaves and apply it on the skin to relieve itching and burning resulting from skin allergies and inflammatory conditions. It has mild analgesic action, and relieves headaches and muscle cramps.

3. Thyme (Thymus vulgaris)


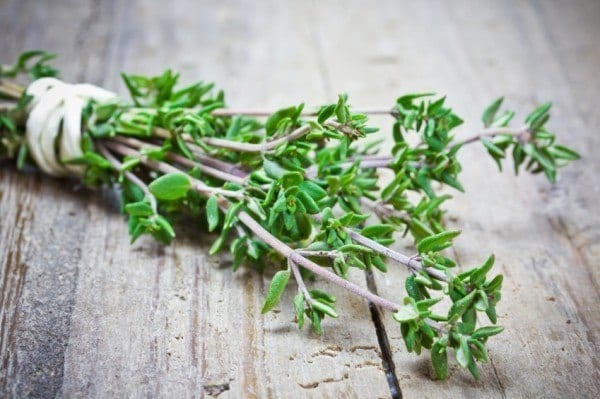
This perennial herb with tiny, aromatic leaves is a great addition to any medicinal herb collection. Thyme is easy to grow in a sunny location and thrives between rocks and boulders, braving summer heat and winter freezes. The characteristic scent of thyme comes from the volatile oil containing thymol, which gets released at the slightest touch. Many herbs contain this powerful antiseptic phenolic compound, but thyme oil has more than 50% thymol content.

Use an infusion of thyme as a gargle to get rid of bad breath and mouth sores. It can help with tonsillitis and laryngitis. Crushed fresh thyme applied on the neck is said to reduce throat infections. Inhaling the vapors reduces nervous exhaustion.

The most important use of thyme is to treat respiratory tract infections. Thyme extract is taken orally to relieve bronchitis, chest congestion, asthma, and whooping cough. A teaspoonful of thyme extract mixed with equal amount of honey can be given in divided doses to young children.

4. Rosemary (Rosmarinus officinalis)

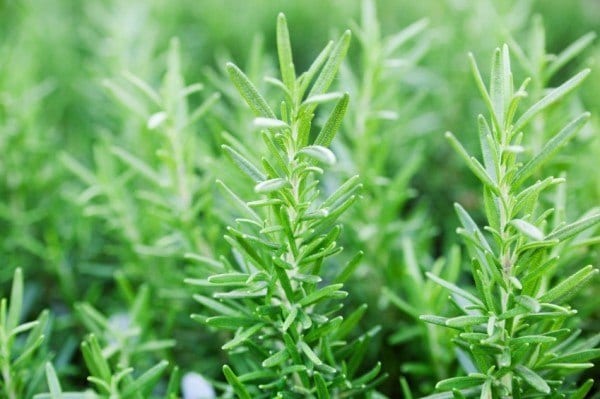
Rosemary is more of a woody shrub, but it deserves a place in every herb garden for its medicinal and culinary uses. Although it doesn’t look anything like other mint plants, it belongs to the same plant family. From the suffix officinalis, it is clear that rosemary has been counted as a medicinal plant from long ago, but in our medicinal garden, it is to be used for general health and wellbeing, rather than for specific problems.

Long known as the herb of remembrance, the claim that rosemary enhances memory has had a boost from recent research findings. The carnosic acid in the herb has been shown to prevent brain damage and neurodegeneration of the hippocampus induced by beta-amyloid peptides. These peptides are implicated in Alzheimer’s disease. In separate studies Rosemary oil has been found to improve cognitive function and reduce brain aging. Its potential in cancer treatment also has been promising.

Grow Rosemary in a pot or plant several in a line to form an aromatic hedge in the garden. Use the leaves regularly in cooking and herbal teas to derive maximum benefit.

5. Chamomile (Chamaemelum nobile)

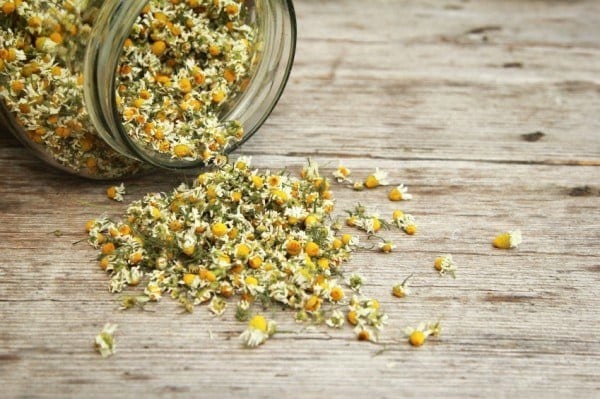
No medicine chest is complete without chamomile flower heads. They can be made into a soothing tea that can calm a troubled mind as well as a colicky baby. Its widespread use across many cultures and for many ailments is proof enough for its safety and effectiveness.

There’s more than one type of chamomile, but the one we want is the Roman chamomile Chamaemelum nobile. This hairy plant has finely divided leaves and white daisy-like flowers with bright yellow centers, but that description doesn’t help much in telling it apart from German chamomile. That’s why scientific names are important for identifying medicinal plants.

When you grow chamomile, you can make a tea from fresh flower heads or dry them for later use. Take a handful of flowers in a bowl and pour boiling hot water over them. Allow to steep for 15-20 minutes and drain. Have a cup of this soothing brew when you feel anxious or unsettled, or before bedtime in case you have difficulty falling asleep.

A tablespoonful or two should calm babies and young children having colicky pain or stomach upsets. Use it as gargle to relieve mouth ulcers. Bathe the skin affected with eczema several times a day with cooled chamomile tea.

6. Pot Marigold (Calendula officinalis)

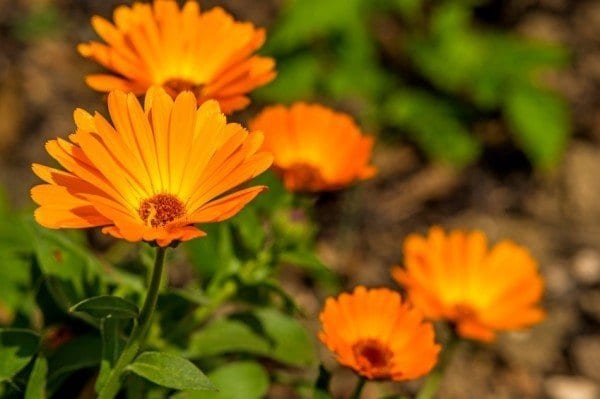
Pot marigold with its yellow and orange flowers is a delightful addition to any garden. Not very finicky about soil fertility or pH, it can be grown easily from seeds and can be treated as an annual or perennial depending on your growing zone.

The edible flowers can be used to treat almost any problem related to skin. Use a poultice of the petals to relieve sunburn and to clear up acne and blemishes on the skin. Use it as an antiseptic on cuts and bruises. It stops bleeding and reduces inflammation when applied on nicks and cuts. Many skin ointments contain pot marigold extract as the active ingredient.

A tea made of the flowers is taken to get relief from varicose veins and to ease digestive problems.

7. Sage (Salvia officinalis)


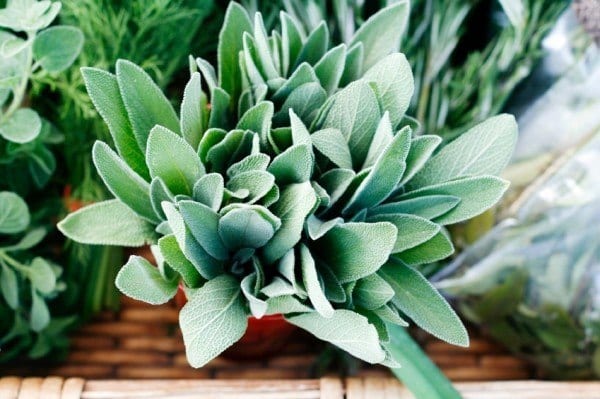
Plants of the aalvia family have a long history of being used medicinally, as is evident from their family name. Salvia officinalis is the common sage that has slightly thick and elongated grey green leaves used in cooking, and for good reason. It can improve appetite and prevent flatulence.

This plant has a hormone regulatory effect on women. A tea of the leaves can relieve dysmenorrhea and symptoms associated with premenstrual syndrome and menopause.  Inhaling an infusion of sage gives relief to respiratory problems, including asthma. It reduces excessive sweating and salivation too. Sage is neuroprotective, and is used to treat Alzheimer’s, dementia, and depression.

8. Lavender (Lavandula angustifolia)

This herb is worth growing for the delightful fragrance of its tiny flowers alone, but it can be used therapeutically as a pick-me-up. Inhaling the fragrance of the flowers is sufficient to get relief from headache and depression. The essential oil extracted from the flowers has an important place in aromatherapy.

Add a handful of lavender flowers to the bathwater or place pouches of dried flowers under the pillow to get relaxed sleep. Make the best of the antiseptic and antibacterial properties of lavender by infusing the flowers in water and using it to wash face and damaged skin. It can clear acne and accelerate wound healing.

9. Echinacea (E. purpurea / E. angustifolia)

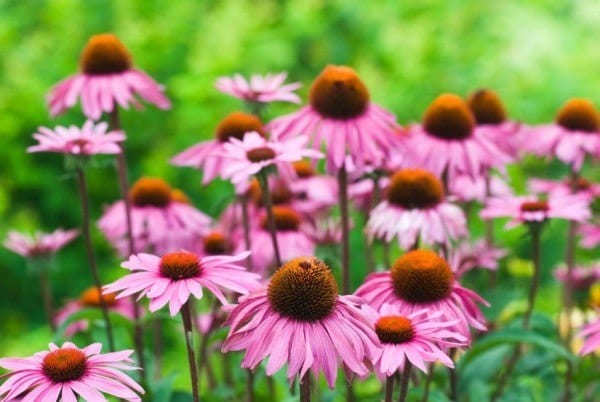
The purple coneflower Echinacea is a stalwart in the native North American herbal medicine. It has an immunostimulatory action that enables the body to fight bacterial and viral infections. Commercial Echinacea products are in great demand during the flu season. Regular users swear by their efficacy as vehemently as conventional medical practitioners try to discredit them.

Native Americans used the roots to treat wounds, insect bites, burns, and even snake bites. Now flower buds are more commonly used as a cold and flu remedy. Of the many different purple coneflowers native to North America, E. purpurea and E. angustifolia are the two most favored species. You can grow either of them in a sunny location in your garden. These biennial plants flower only in the second season.

Use fresh flower buds to make an infusion to prevent and treat cold and flu. A tincture made with alcohol is considered more potent. It involves steeping the flower buds or roots, or both, in pure, concentrated alcohol for 4-6 weeks, and then filtering out the liquid.

10. Comfrey (Symphytum officinale)

This is another vigorously growing herbaceous plant that has a weed status today in most places. However, the roots and leaves of comfrey are traditionally used to treat ligament injuries and broken bones, earning it common names like boneset and knit bone. Other uses of the leaf and root poultice include relief from arthritic pain and varicose vein ulcers.

Although comfrey extract has a history of being used internally to treat excess menstrual flow, gastrointestinal problems and stomach ulcers, only topical application is recommended today. The allantoin in the plant can aid tissue repair and regeneration. Gargling with an infusion of comfrey leaves helps relieve sore throat and gum disease.

11. Broadleaf plantain (Plantago major)

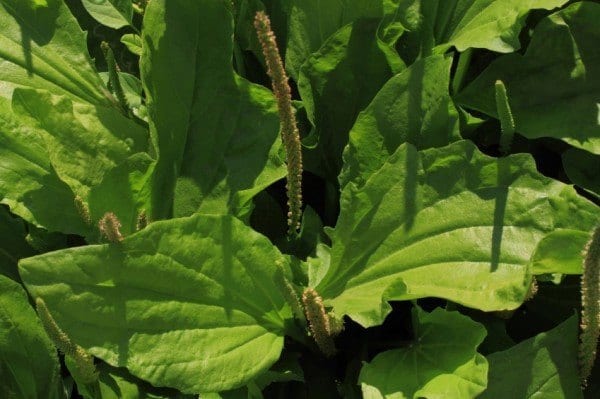
This plant is considered a weed, but it has several medicinal properties including antimicrobial, anti-inflammatory and wound-healing ability. The fresh leaves are mashed and applied as a poultice to wounds, insect bites and skin sores for pain relief and to promote healing. The allantoin in the plant is a cell growth promoter. Another bioactive compound aucubin is a mild antibiotic, and the high mucilage content soothes the injured skin and relieves pain.

A tea brewed from fresh leaves is astringent, and helps control diarrhea. The leaves are eaten by people suffering from gout since aucubin increases uric acid excretion by the kidneys.

12. Great Mullein (Verbascum thapsus)

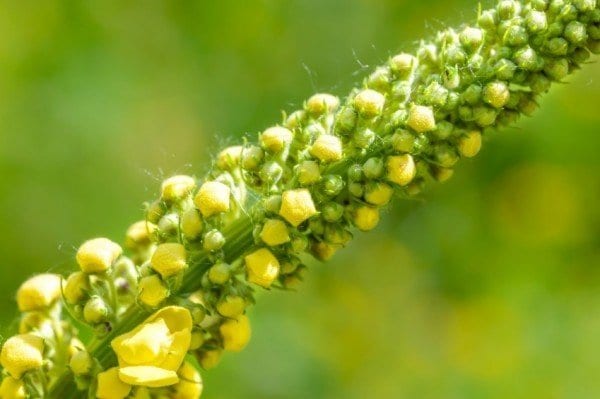
This tall plant growing up to 2 feet high stands out anywhere it grows. But if you offer it a place in your medicinal garden, you can harvest the leaves and the flowers. They have been used for over 2,000 years to treat respiratory tract problems.

Mullein tea made with leaves or flowers is an excellent expectorant. It is used to relieve cough associated with bronchitis and consumption. The mucilage in the plant helps loosen the phlegm and the saponins help flush them out. When the infection has affected the lungs, mullein leaves are rolled up and smoked to relieve chest congestion.

The roots are used to treat skin infections, including warts and athlete’s foot. Powder the dried roots and apply it on the affected area several times a day. Mullein flower tea is also effective in treating warts.

Note: All herbs should be used with caution because they contain powerful bioactive compounds. Start with small quantities initially to test your tolerance. Watch out for allergic reactions. People who have ragweed allergy may have similar reactions to medicinal plants belonging to that family.

When you feel good with a recommended amount of a given herb, it doesn’t necessarily mean that you will feel better with larger quantities or a stronger brew. To derive maximum benefit out of the herbs you grow, try to learn as much about them as you can. Rosemary Gladstar’s Medicinal Herbs Book is a great place to start. 


source by : http://www.naturallivingideas.com/medicinal-herb-garden/

Saturday, November 21, 2015

10 Creative Seed Starting Ideas


If you are looking for an inexpensive way to start your seeds this spring then we have a great post sharing creative ways in which you can use old and used items to do just that.

You can use lemon peels, eggshells, newspaper, toilet paper rolls, milk jugs and much more!

Take a look at these creative seed starter ideas and get growing!

A Citrus Peel Starter Pot For Seedlings – Half a lemon can provide a perfect first home for any seedling. Robust yet decomposable, there is no need to even take the seedling out when re-planting outside.

Egg Shell Pots – Instead of throwing old egg shells into the compost, rescue them by giving them another job – a great home for chive seeds.

K-Cup Recycling – If you are fan of those little K-Cup coffees then you will probably realise that they are perfect for starting little seeds off in.

Newspaper Pots – Are you not a fan of transporting matured seedlings into a planter or your garden? Then this is the ideal solution for you! These are biodegradable and require no transferring!


Plastic Bottle Pots – Another brilliant way to use old items and recycle them with another use. These can be used time and time again!


Toilet Paper Rolls – Who knew that these were so versatile? This particular way of starting seeds is a great one for kids on the weekend – simple and effective!


Paper Pulp Seed Starters – These require a little effort, but once made will make a great seed starter! Again you are using old items that are destined for the recycling pile!

Milk Jug Seed Starters – If you want your seeds to have a little more room then this is the diy for you. Old milk jugs create a perfect greenhouse effect to keep your seeds moist. 


Ice Cube Tray Seed Starter – If your ice cube tray breaks or develops a crack – don’t throw it out, turn it into a mini-seed starter tray instead! 


Seedling Starter Tray – What happens if you take coffee filters, a garbage bag and old cardboard box? Well follow this tutorial and you will end up with a fantastic seed starting tray!


Sunday, November 15, 2015

7 tips for growing an organic garden

1. Prepare Soil


    Image source: Smiling Gardener

Get off to a good start and test your soil with a kit you can buy online. Ideally you should mix in compost and garden wastes such as hedge and grass clippings to enrich the soil with nutrients. This will get you off to a good start. If you are working with a patio or small yard, a good quality heap of compost and topsoil in a few reusable growbags will work just as well.


2. Start Composting

    Image source: How to Compost

Add raw food waste to dry materials like straw and leaves, and turn regularly with a garden fork or by using a rotating compost bin. Once the heap is a substantial size, top it off with half a foot of soil and it should be ready to use within a couple of months’ settling. If you don’t have the room to compost find your nearest community garden and see if there is a compost exchange scheme you can join: old kitchen peels for tasty plant meals...


3. Seeds or seedlings?

    Images source: Chicago Now

Look at the conditions in your garden over a 24 hour period. Note sunny spots and shady areas and chose your crops based on this - it’s best to work with what you’ve got! A trip to any garden centre will help you select seeds - just check the packets for optimal growth. Germinating from seed is easy with progator trays and a warm windowsill but if you do want to get a jump start you can buy seedling plants from garden centres and farmers markets, just ensure they haven’t be treated with chemicals and that their roots aren’t overcrowded.


4. Planting

    Image source: Gardenista

To reduce on waste water and your own waste energy by grouping your plants together. Grow bags and raised beds are good for this, preventing your organic garden becoming part of the garden that gets trampled and played on! Keep your rows thin when planting out seedlings, this prevents some plants overshadowing others and thinning rows over the first weeks keeps the strongest plants developing at a healthy rate.


5. Watering

    Image source: Gardenista

Water your plants once or twice a week, in the morning with air temperature water. Morning watering prevents moisture loss as the soil is at its coolest after the dark hours. Air temperature water - collected rainwater if possible - is advised for young plants and it is important to water as close the base of the plant as possible - the leaves will get the goods once the roots have been tended to! 


6. Weeding—everyone's favourite!

    Image source: Gardener's Blog

It can be a pain and is certainly an obstacle to gardening if you are less able bodied than a landscape gardener, but avoiding the use of chemicals in the garden should be your main priority when organically growing crops and plants. Mulching the garden is the best way to  protect the soil from weeds and degradation of nutrients. Mulch can be bought in various forms (some more processed and biodegradable than others) from garden centres and community gardens - and it is possible to make your own from mixed combinations of straw, wood chips and garden waste. 


7. Natural Pest Control

    Image source: Young Urban Farmers

Prevention is better than cure, and humane deaths are better than chemical ones. Potting small sweet blooms near the organic garden will habour helpful insects to prey on greenfly and other little pests. Try dill, coriander or sweet alyssum to bring in ladybirds, wasps and syrphid flies. For slugs, again, water the soil in the morning. Ever woken to complete munched-down failure? That’s because slugs wreak havoc best in the moist dark. And you can also catch them knowing this: a nearby damp board or propped-up flagstone makes for a welcome hidey-hole for slugs and snails in the day time. There are also a number of gardeners tricks for greedy little pests: coffee grounds or seaweed (if available) around the base of plants, caffeine and garlic sprays for plants are also on the market and a good old saucer of beer will attract a greedy slug and send him off with a toast! 


Wednesday, September 16, 2015

Garlic Plant in Warmer Climates

How To Grow Garlic In Warmer Climates


Garlic is a bulb and because it is a bulb, most garlic varieties need to have a certain amount of cold weather to form the tasty bulbs we like to eat. For gardeners in warmer climates, this can be a frustrating fact, but not one that needs to keep them from growing garlic in the garden. A little knowledge about garlic and garlic varieties is all it takes to know how to grow garlic successfully in warmer climates.

Garlic Varieties


Gardeners in warmer climates, zones 7-9, will have a difficult time growing garlic in the garden from just any garlic varieties. Most likely you will want to look for some of the gourmet or heirloom cultivars that grow well in warmer weather. These cultivars include:

Creoles
Asiatic
Hardnecks
Marbled Purple Stripe

These cultivars may not be available at your local garden center but can be found online at many reputable online garlic dealers.

How to Plant Garlic


When and how to plant garlic in warmer climates is a bit different than in cooler climates. For one, you can plant the garlic later and for two, you can harvest it sooner. Plan to plant your garlic in late October through early December.

When you plant your garlic, what you will be doing is growing garlic from cloves, so take one clove off the bulb and plant it into the prepared bed. Remember, just like flower bulbs, the pointy end of the clove goes up. You will want to plant the garlic clove about 8 to 10 inches down in the dirt. Space them about 6 to 8 inches apart.


How Does Garlic Grow in the Winter


In warmer climates, you can expect to see growth from your garlic all winter long. This will appear in the form of garlic greens coming from the clove. In cooler climates, the greens do not grow until spring. Don’t worry about the occasional drop in temperature, as garlic and its greens are more than able to handle the cold.

When to Harvest Garlic


In late spring or early summer, your garlic plant will start to flower. Let it flower. Once the flower is dead and the leaves have browned one-half to two-thirds of the way down the stem, dig your garlic up. This should happen no later than July.

Once you have harvested your garlic, you can store it and save some for growing garlic from cloves again in a few months.

The mystery of how to grow garlic in warmer climates is not really a mystery at all. With the right varieties and the right planting schedule, you too can be growing garlic in the garden.

source by: http://www.gardeningknowhow.com/edible/herbs/garlic/how-to-grow-garlic-in-warmer-climates.htm

Soil Care for Organic Gardening

SOILS


What’s the most essential element needed for healthy plants, lawns and landscapes? Deep, rich organic soil. But we haven’t met anyone who’s started with the perfect spot of earth right away.

Busting up clay, building up sand, and tweaking to get the pH level that plants adore takes time and preparation. Since each patch of ground is unique, there are no quick and simple answers. But we know what really works, using only natural amendments that hold on to nutrients and water.

Start from the bottom up


Build on a strong foundation. With excellent air flow, water retention and storehouse of minerals underground, you’ll see dense, complex root growth that will help your plants withstand wind and drought. Your plants won’t have to work hard to find what they need.

Feed your plants at the roots – right where they need it. By adding amendments like compost, greensand or kelp meal directly into the soil, energy can be channeled into strong growth.

Ditch chemical fertilizers that are more likely to be washed into groundwater and local streams than help your plants. Instead, choose ingredients that come from the earth, packed full of vital micronutrients that will stick around long after the first rain of the season.

Check your pH. There’s an acid-basic sweet spot that allows plants to access all the nutrition they can find. A simple test will show if your plot is in that range, and we can help suggest amendments if it needs improvement.

If you’re looking for the fastest ticket to a lush garden, start at ground level. You’ll produce healthy, disease-resistant plants year after year.

Effective Weed Control Tips for Organic Gardener

If you were to track every hour spent in your garden, you would probably find that you do an inordinate amount of weeding. And while the first few weeks of tearing up these intruders can prove mildly satisfying, the chore soon wears thin. Even more maddening—you are just six simple strategies away from your garden not needing weeds anymore.
What’s that? A garden needs weeds? Weeds are nature’s healing remedy for sites that are in a wounded, plantless state, but weeds and gardeners have different ideas of what makes for a good recovery. Armed with a better understanding of weeds and the strategies outlined here, you can win every future skirmish, giving you more time to enjoy your well-groomed garden.

Six Tips for Effective Weed Control

Proven methods for controlling weeds in your garden


1. LET SLEEPING WEEDS LIE
Every square inch of your garden contains weed seeds, but only those in the top inch or two of soil get enough light to trigger germination. Digging and cultivating brings hidden weed seeds to the surface, so assume weed seeds are there ready to erupt, like ants from an upset anthill, every time you open a patch of ground. Dig only when you need to and immediately salve the disturbed spot with plants or mulch. In lawns, minimize soil disturbance by using a sharp knife with a narrow blade to slice through the roots of dandelions and other lawn weeds to sever their feed source rather than digging them out. Keep in mind that weed seeds can remain dormant for a long, long time.

2. MULCH, MULCH, MULCH
Mulch benefits plants by keeping the soil cool and moist and depriving weeds of light. Organic mulches, in particular, can actually host crickets and carabid beetles, which seek out and devour thousands of weed seeds.
Some light passes through chunky mulches, and often you will discover—too late—that the mulch you used was laced with weed seeds. It’s important to replenish the mulch as needed to keep it about 2 inches deep (more than 3 inches deep can deprive soil of oxygen). In any case, you can set weeds way back by covering the soil’s surface with a light-blocking sheet of cardboard, newspaper, or biode­gradable fabric and then spreading prettier mulch over it.
If you choose to use this method on seldom-dug areas, such as the root zones of shrubs and trees, opt for tough landscape fabric for the light-blocking bottom sheet. There is a catch, however: As soon as enough organic matter accumulates on the landscape fabric, weed seeds dropped by birds or carried in on the wind will start to grow. For the bottom layer of fabric to be effective, these must be pulled before they sink their roots through and into the ground.

3. WEED WHEN THE WEEDING’S GOOD

The old saying “Pull when wet; hoe when dry” is wise advice when facing down weeds. After a drenching rain, stage a rewarding weeding session by equipping yourself with gloves, a sitting pad, and a trug or tarp for collecting the corpses. As you head out the door, slip an old table fork into your back pocket because there’s nothing better for twisting out tendrils of henbit or chickweed. When going after bigger thugs, use a fishtail weeder to pry up taprooted weeds, like dandelion or dock.
Under dry conditions, weeds sliced off just below the soil line promptly shrivel up and die, especially if your hoe has a sharp edge. In mulched beds, use an old steak knife to sever weeds from their roots, then patch any open spaces left in the mulch.

4. LOP OFF THEIR HEADS
When you can’t remove weeds, the next best thing is to chop off their heads. With annual weeds, dead­heading buys you a few weeks of time before the weed “seed rain” begins. Cutting back the tops of perennial weeds, like bindweed, reduces reseeding and forces them to use up food reserves and exhaust their supply of root buds, thus limiting their spread.
You will need pruning loppers to take down towers of ragweed or poke, or you can step up to a string trimmer equipped with a blade attachment to cut prickly thistles or brambles down to nubs. No matter which method you choose, chopping down weeds before they go to seed will help keep them from spreading.

5. MIND THE GAPS BETWEEN PLANTS

Close plant spacing chokes out emerging weeds by shading the soil between plants. You can prevent weed-friendly gaps from the get-go by designing with mass plantings or in drifts of closely spaced plants rather than with polka dots of widely scattered ones. You can usually shave off about 25 percent from the recommended spacing.
Most spacing recommendations, however, are based on the assumption that adjoining plants will barely touch when they reach mature size, so stick with the guidelines when working with plants that are prone to foliar diseases, such as bee balms (Monarda didyma and cvs., USDA Hardiness Zones 4–9) and phloxes (Phlox paniculata and cvs., Zones 4–8).


6. WATER THE PLANTS YOU WANT, NOT THE WEEDS YOU'VE GOT
Put drought on your side by depriving weeds of water. Placing drip or soaker hoses beneath mulch efficiently irrigates plants while leaving nearby weeds thirsty. In most climates, depriving weeds of water reduces weed-seed germination by 50 to 70 percent. Watch out, though, for the appearance of deeply rooted perennial weeds, such as bindweed and nutsedge, in areas that are kept moist. They can take off in a flash when given the benefits of drip irrigation.
Beyond these strategies, enriching your soil with organic matter every chance you get can move your garden along down the weed-free path. Soil scientists aren’t sure how it works, but fewer weed seeds germinate in soil that contains fresh infusions of good compost or organic matter. One theory makes elegantly simple sense: When soil is healthy and well fed, weed seeds sense that they are out of a job and are less likely to appear.


Organic Farming Concept and Development


Organic farming system in India is not new and is being followed from ancient time. It is a method of farming system which primarily aimed at cultivating the land and raising crops in such a way, as to keep the soil alive and in good health by use of organic wastes (crop, animal and farm wastes, aquatic wastes) and other biological materials along with beneficial microbes (biofertilizers) to release nutrients to crops for increased sustainable production in an eco friendly pollution free environment.


As per the definition of the United States Department of Agriculture (USDA) study team on organic farming “organic farming is a system which avoids or largely excludes the use of synthetic inputs (such as fertilizers, pesticides, hormones, feed additives etc) and to the maximum extent feasible rely upon crop rotations, crop residues, animal manures, off-farm organic waste, mineral grade rock additives and biological system of nutrient mobilization and plant protection”.


FAO suggested that “Organic agriculture is a unique production management system which promotes and enhances agro-ecosystem health, including biodiversity, biological cycles and soil biological activity, and this is accomplished by using on-farm agronomic, biological and mechanical methods in exclusion of all synthetic off-farm inputs”.


Need of organic farming


With the increase in population our compulsion would be not only to stabilize agricultural production but to increase it further in sustainable manner. The scientists have realized that the ‘Green Revolution’ with high input use has reached a plateau and is now sustained with diminishing return of falling dividends. Thus, a natural balance needs to be maintained at all cost for existence of life and property. The obvious choice for that would be more relevant in the present era, when these agrochemicals which are produced from fossil fuel and are not renewable and are diminishing in availability. It may also cost heavily on our foreign exchange in future.


The key characteristics of organic farming include


  • Protecting the long term fertility of soils by maintaining organic matter levels, encouraging soil biological activity, and careful mechanical intervention.
  • Providing crop nutrients indirectly using relatively insoluble nutrient sources which are made available to the plant by the action of soil micro-organisms.
  • Nitrogen self-sufficiency through the use of legumes and biological nitrogen fixation, as well as effective recycling of organic materials including crop residues and livestock manures.
  • Weed, disease and pest control relying primarily on crop rotations, natural predators, diversity, organic manuring, resistant varieties and limited (preferably minimal) thermal, biological and chemical intervention.
  • The extensive management of livestock, paying full regard to their evolutionary adaptations, behavioural needs and animal welfare issues with respect to nutrition, housing, health, breeding and rearing.
  • Careful attention to the impact of the farming system on the wider environment and the conservation of wildlife and natural habitats.


Fertilize Your Organic Garden


Organic fertilizers generally come from plants, animals, or minerals. Soil organisms break down the material into nutrients that plants can use. Some organic fertilizers contain significant amounts of only one of the major nutrients, such as phosphorus in bone meal, but they often have trace amounts of many other beneficial nutrients. In addition, some gardeners add organic material that improves soil structure and supports soil microorganisms, which helps make nutrients available more quickly, especially in warm weather when they are more active. As a general rule, organic fertilizers release about half their nutrients in the first season and continue to feed the soil over subsequent years.


Examples of organic fertilizers:


Plant fertilizer - sea kelp (seaweed), alfalfa meal, corn gluten meal and cottonseed meal. 


Green manure - living cover crop plants turned into the soil.


Natural fertilizer from animals - Whether by land, by air, or by sea, animals, fish, and birds all   provide organic fertilizers that can help plants grow. Most animal-based fertilizers provide lots of nitrogen, which plants need for leafy growth.


Mined natural fertilizer - Rocks decompose slowly into soil, releasing minerals gradually over a period of years. Organic gardeners use many different minerals to increase the fertility of their soils, but it's a long-term proposition. Some take months or years to fully break down into nutrient forms that plants can use, so one application may last a long time. 


How To Get Started - The best way to evaluate your own situation is to start with a  soil test. 

source by: https://www.groworganic.com/fertilizers/organic-fertilizer.html