Showing posts with label organic vegetable gardening. Show all posts

Thursday, November 26, 2015

9 Clever Ways To Use Essential Oils In The Garden

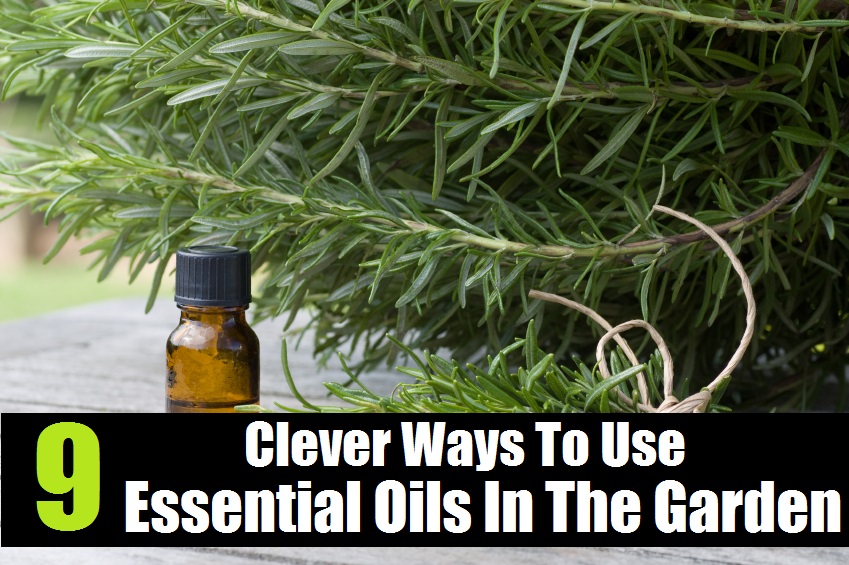
Whether your intent is to repel pests, invite pollinators, or to turn your garden into a relaxing get-away, essential oils can help!  Check out these 9 clever ways to use essential oils in the garden.

1. Repel Insect Pests
There are a wide variety of essential oils which – with consistent use – can be used to repel unwanted insect pests from your garden.

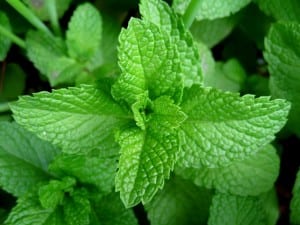
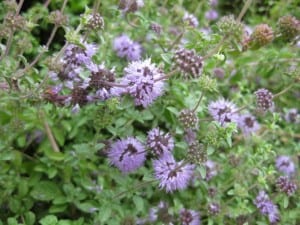
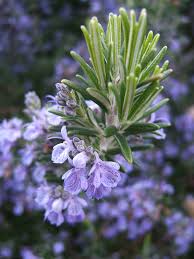
Rosemary oil is a potent repellent for many types of pesky insects including flies, fleas and mosquitoes.  Rosemary is also great for deterring insect larvae like the cabbage looper caterpillar whose voracious appetite for juicy vegetable foliage can easily destroy entire crops of Brassicas, tomatoes, cucumbers, melons, and even some root veggies if left undisturbed.  Peppermint oil is an excellent natural insecticide which works on aphids, squash bugs, white flies, ants, beetles, and fleas, just to name a few.  Peppermint is also the best essential oil for repelling spiders.  Thyme oil works against biting insects like chiggers, ticks, and roaches.  Clove oil is another great deterrent for many flying insects.

To create a broad-spectrum all-natural insect repellent, mix equal parts of rosemary, peppermint, thyme, and clove oils (about 10 drops of each) in a spray bottle filled with water.  Remember to shake well before each use.  Apply anywhere you want to get rid of skittering, creeping, crawling, or flying pests.

For particularly bad infestations, try using Neem oil.  This natural insecticide dissolves the waxy coating of many hard-to-kill garden parasites, dehydrating, and eventually killing them.  Neem oil not only works on adult insects.  It also kills larvae and eggs, making Neem oil a super-effective all-natural method for reducing populations of insect pests.

2. Suppress Fungus
The cause of around 85% of all plant diseases, garden fungus can quickly become a big problem if left untreated.  Parasitic fungi cause damage by poisoning or killing cells, blocking stomata (breathing pores), and stealing nutrients from the plant.  If you’re seeing signs of disease in your garden, chances are pretty good that there is a fungus to blame.  Try some of these essential oils to stop fungal pests from spreading:

Tea Tree oil is one of the few natural remedies with the power to not just prevent fungal growth, but also to kill many species of fungus.  To treat existing fungal growth or as a preventative, mix about one tablespoon of tea tree oil per cup of water in a spray bottle.  Apply directly to infected plants once or twice per week.  Remember to avoid spraying leaves when the weather is very hot and dry as sun-heated tea tree oil can easily burn leaves.


For more information regarding the use of tea tree oil to control garden fungus, read Tea Tree Oil Fungicide for Plants on SFGate.

Previously mentioned Neem Oil is as effective against fungal infections on plants as it is for treating insect infestations.

Two organic compounds in Citronella oil – citronellal and linalool – have been proven to inhibit the growth of many species of fungus.  Other essential oils with powerful fungicidal properties include Rosemary, Oregano, Thyme, Peppermint, Clove, and Cinnamon oils.  Also effective against garden fungus are oils extracted from plants in the Allium family (Onion, Garlic, etc.)

To create an anti-fungal garden spray using any of these ingredients, add 8 – 10 drops of essential oil into a large glass spray bottle filled with water.  Remember to shake before each use.

3. Stop Slugs and Snails
Cedarwood, Hyssop, and Pine are the best essential oils for keeping gastropods off of your plants.  Mix about a teaspoon of your chosen oil(s) in a spray bottle filled with water.  Apply diluted oil in a ring around plants where slugs and snails like to visit.  Refresh as needed.

4. Discourage Vermin
Mice and other rodents are repulsed by the clean, fresh scent of peppermint.  Douse cotton balls with 1 – 2 drops of Peppermint oil a piece then tuck them into the entrances of mouse holes, squirrel nests, and other rodent burrows to persuade rodent residents to relocate.  Replace as needed.

5. Dissuade Pets
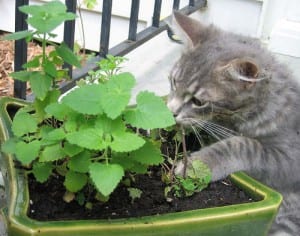
Did you know that cats hate the smell of Rosemary?  If you can’t seem to keep the neighborhood tomcat from leaving his delightful presents amidst your herbs and veggies, try spraying your mulch with Rosemary oil diluted in water. Alternately, you can add a few drops of Rosemary oil to a wide, shallow container partially filled with water. Whisk vigorously to break up oil droplets then drop in strips of cloth or pieces of string.  Allow them to soak long enough to absorb all of the oil.  Tie strings between plants or around the garden perimeter.  Hang cloth strips between garden rows, around plants, or anywhere you know the cat likes to dig.  Refresh as needed.

Black Pepper (or any other pepper, for that matter) essential oil can also be used to deter larger mammals from your garden.  Dogs, in particular, with their sensitive noses will be turned away from the strong odor of pepper oil.  Apply using the same string / cloth method as with Rosemary oil (above).  Just keep in mind that over-use of this essential oil may make your garden less pleasant for humans as well.

6. Treat Bites & Stings
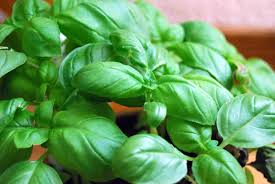
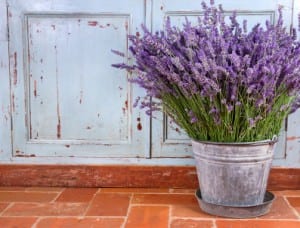
Bites and stings from bees, wasps, ants, and other insects are always a possibility, even for the most careful gardener.  Mix 2 drops of Lavender oil, 2 drops of  Chamomile, and 1 drop of Basil essential oil with one teaspoon of Organic Apple Cider Vinegar.  Apply this remedy to fresh bites and stings with a cotton ball or pad.

Alternately, you can mix the same oils, but substitute Jojoba oil for the ACV.  Cleanse bites and stings with a cotton ball soaked in ACV, dab dry, then applying the soothing oil blend.

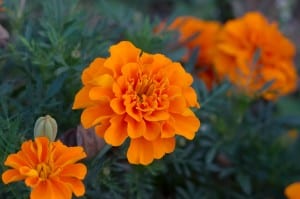
7. Attract Pollinators
Essential oils aren’t just for repelling unwanted creatures from your garden.  You can also use certain fragrant oils to attract natural pollinators to your garden.  The scent of Neroli (orange blossom) is an irresistible attractant for bees, as are the essential oils of many small-blossomed flowers such as Lavender, Hyssop, Marjoram, Helichrysum, Basil, Sage, and Rosemary.  Also, try Lavender, Yarrow, Catmint, Fennel, Helichrysum, and Sage essential oils to attract more butterflies to your garden.

8. Enhance the Mood
Perhaps you have a private little nook – a sanctuary filled with growing things where you go to relax after a long and stressful day.  Why not add an essential oil burner and fill it with aromatherapy oils to enhance the calming effects of your secret garden?  Check out these tips for mixing essential oils.

For the best selection of therapeutic-grade aromatherapy essential oils on the internet, we recommend Mountain Rose Herbs!

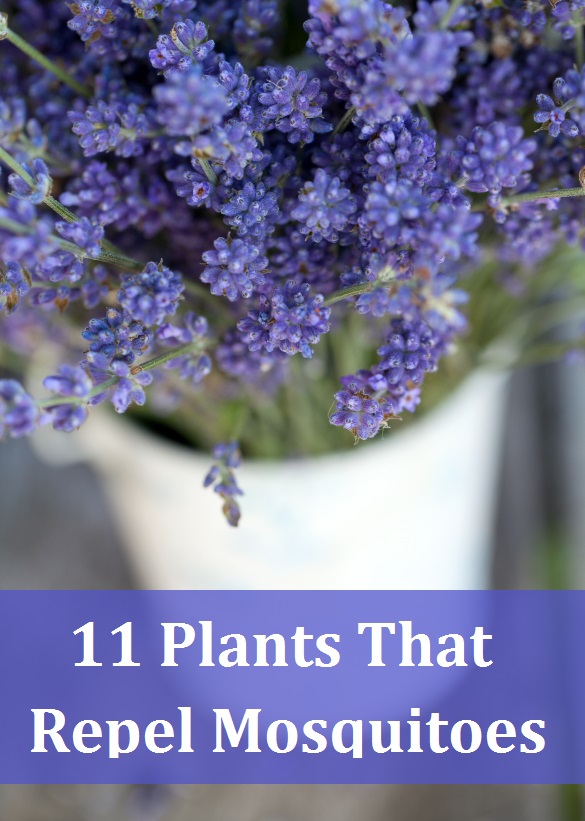
9. Make Your Own Mosquito Repellent
Probably the most well-known essential oil for repelling mosquitoes and other biting insects is Citronella.  However, if you aren’t a big fan of the scent of this pungent herb, there are plenty of alternatives which can be used to keep these annoying blood-suckers away from your skin.  Either way, just follow these simple instructions to create your own natural mosquito repellent.

Before you begin, you’ll need a small glass spray bottle filled with about 2 ounces of water and 1 ounce of organic witch hazel.  You can also add about 10 drops of jojoba oil which is a natural insect repellent and great skin conditioner.  Once you’ve done this, it’s time to pick out your essential oils.

The “Heavy Hitters” – (Choose one or two.)
Because these oils are very strong, they should be used in smaller amounts than the other ingredients in your mosquito repellent.  Choose one or two from the following six essential oils and add 2 – 4 drops total to the mixture.

Citronella, Lemongrass, Cajeput, Eucalyptus – all great natural insect repellents

Peppermint – also works against ants, flies, lice, and spiders.

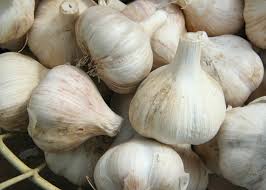
Garlic oil – personally tested and confirmed to be very effective.  (Even tiny six-legged vampires hate garlic!)

The “Distance Runners” – (Choose at least one.)
These essential oils have lower levels of volatile organic compounds so they tend to have richer, longer-lasting aromas than the ingredients from the first category.  Keep in mind that this will be the main ingredient – and thus the main scent – in your natural mosquito repellent.  Choose your favorite (or favorites, if you want to use more than one) from the following five oils and add 10 – 15 total drops to the mix.

Clove, Lavender, Tea Tree – all effective natural insect repellents

Pine oil – also works well against fleas and ticks.

Rosemary – keeps flies away in addition to mosquitoes.

The “Harmonizers” – (Choose one, maybe two.)
These oils help to balance out your blend and stabilize the more volatile, strong-smelling ingredients.  Choose one (maybe two) essential oils from the following three oils and add 3 – 6 drops total to top off your homemade mosquito repellent.

Cedarwood – natural insecticide with a fresh piney fragrance.

Sandalwood – somewhat weak protection against mosquitoes, but has an incredible warm and woody aroma.

Patchouli – deters bed bugs, ants, fleas, and lice in addition to mosquitoes.  Very strong, smoky and musky scent.

Always remember to shake well before spraying your all-natural homemade mosquito repellent!

Essential oils have a huge number of uses for health, beauty and around the home, and with the advice of this article, you now know how you can use essential oils in the garden.

Need any of the essential oils mentioned in this article? The best place to buy them is from this page on Mountain Rose Herbs.


Monday, November 23, 2015

11 Plants That Repel Mosquitoes

The days are finally getting longer, the snow is (slowly!) beginning to melt, and spring officially arrives in just a few days! While the prospect of warmer weather has us all a bit giddy, we can’t forget the unwelcome intruders that tag along with the sunny summer weather.

Yes, we are talking about mosquitoes, and everybody knows that they can be a huge nuisance. However, using chemical products to keep them away is not on the top of everyone’s wish list.

Read on for some ideas of plants that repel mosquitoes – naturally!

Citronella

Chances are, you’ve heard of this one before- it’s one of the most common ingredients in most mosquito repellents. Strange enough though, many people don’t even know that citronella is actually a plant! Citronella is a beautiful perennial clumping grass that emits a strong aroma. That aroma masks other scents, and keeps mosquitoes from being attracted to things located around it. The citronella plant has a much stronger aroma than other mosquito repellents that contain citronella, so it is a great choice. Citronella is very easy to grow, and can get to be a very tall 5 or 6 feet high! You can grow citronella in pots and place it around a porch or patio, or you can plant it directly in a yard or garden bed. It’s a great choice for repelling mosquitoes naturally.

You can actually buy two large live citronella plants from this page on Amazon. There’ll be no need to wait for seeds to grow – you can start repelling mosquitoes immediately.

Lemon Balm

Another great choice for a mosquito repelling plant is lemon balm. A member of the mint family, the plant also known as horsemint and beebalm is a very easy plant for beginning gardeners to grow- even if you don’t have a green thumb! Lemon Balm is a very hardy plant, it resists drought, and it grows well even in shade. It is a very fast growing and sometimes aggressive plant, so you might want to contain it to a pot, where you can move it to wherever you like to ensure that it doesn’t take over your garden! An added bonus? You can dry the leaves and use them to make a delicious herbal tea!

Catnip

Your feline friends will be happy to know that catnip is a great mosquito deterrent! In fact, in a 2010 study, researchers found that catnip is 10 times more effective than DEET, the ingredient commonly found in bug repellents. It is a very easy plant to grow, and if you have cats in the house, they will surely be happy to have it around. However, be careful not to plant catnip in with other flowers, veggies, or herbs if you have cats around your garden. They will surely roll around in the catnip and smash everything nearby!

Marigolds

A bright, hardy annual plant, marigolds are a great choice for repelling mosquitoes. Marigolds contain Pyrethrum, an ingredient found in many insect repellents, and they have a unique aroma which bugs find repulsive. The flowers themselves are beautiful and can make a great border or addition to any flower bed! Try placing them around borders of your home, and mosquitoes might not want to cross over!


Basil

Calling all cooks! Want a double whammy when it comes to mosquito protection? Plant some basil! Not only will you have a quick and easy mosquito repellent, you will also have a delicious fresh herb on hand to add to all of your favorite recipes! There are many different varieties of basil around, so feel free to experiment and find the ones that you like best. Many expert gardeners recommend trying lemon basil or cinnamon basil to deter insects.


Lavender

You probably know that lavender is a gorgeous purple flowering plant with a soothing, calming scent. But, did you know that it is also a natural mosquito repellent? Grow it indoors near a sunny window, or outside in your garden or flower bed to keep the bugs away. While you’re at it, make a delicious herbal tea, or use lavender to fill your home with a wonderful calming aroma.


Peppermint

Most bugs despise the smell and taste of peppermint, so planting it around your home is a great way to keep them from dropping by uninvited! Plus, if you do happen to get bitten, peppermint leaves rubbed directly onto the skin make a great itch relief treatment! Added bonus for the wonderful minty smell that makes a delicious addition to food and beverages!


Garlic

Unfortunately for all of us who love Italian food, studies have shown that EATING garlic does not repel mosquitoes. (Unless, however, you were to eat a HUGE amount!) However, having garlic around DOES! Make sure to add some garlic to your flower bed or vegetable garden for added protection!


Pennyroyal

The adorable pennyroyal flower is a natural deterrent for mosquitoes! Make sure to plant some around your flowerbeds! Pennyroyal plants also make great groundcovers, and they attract a plethora of beautiful butterflies. Some people even use pennyroyal to flavor certain fish dishes. As you can see, this plant has plenty of benefits!


Rosemary

Rosemary is a beautiful flowering plant that is often used to flavor lamb or fish dishes, but did you know that it is also a natural mosquito repellent? It’s perfect to add to your herb garden or flowerbed to keep bugs away, and it even attracts butterflies!

Plus you can simply snip a few springs off every time you need to add extra flavor to your lamb or steak!


Geranium

This beautiful flowering plant is a great choice for mosquito repellent. When planted in a hanging container, the colorful blooms will cascade over the side of the pot, providing a beautiful visual piece as well as a very useful bug repellent!

As you can see, there are many different plants out there that can help to keep bugs away! Next time you reach for the chemical bug spray, take a minute and think again, and choose something more natural!


source : http://www.naturallivingideas.com/11-plants-that-repel-mosquitoes/

Wednesday, September 16, 2015

Garlic Plant in Warmer Climates

How To Grow Garlic In Warmer Climates


Garlic is a bulb and because it is a bulb, most garlic varieties need to have a certain amount of cold weather to form the tasty bulbs we like to eat. For gardeners in warmer climates, this can be a frustrating fact, but not one that needs to keep them from growing garlic in the garden. A little knowledge about garlic and garlic varieties is all it takes to know how to grow garlic successfully in warmer climates.

Garlic Varieties


Gardeners in warmer climates, zones 7-9, will have a difficult time growing garlic in the garden from just any garlic varieties. Most likely you will want to look for some of the gourmet or heirloom cultivars that grow well in warmer weather. These cultivars include:

Creoles
Asiatic
Hardnecks
Marbled Purple Stripe

These cultivars may not be available at your local garden center but can be found online at many reputable online garlic dealers.

How to Plant Garlic


When and how to plant garlic in warmer climates is a bit different than in cooler climates. For one, you can plant the garlic later and for two, you can harvest it sooner. Plan to plant your garlic in late October through early December.

When you plant your garlic, what you will be doing is growing garlic from cloves, so take one clove off the bulb and plant it into the prepared bed. Remember, just like flower bulbs, the pointy end of the clove goes up. You will want to plant the garlic clove about 8 to 10 inches down in the dirt. Space them about 6 to 8 inches apart.


How Does Garlic Grow in the Winter


In warmer climates, you can expect to see growth from your garlic all winter long. This will appear in the form of garlic greens coming from the clove. In cooler climates, the greens do not grow until spring. Don’t worry about the occasional drop in temperature, as garlic and its greens are more than able to handle the cold.

When to Harvest Garlic


In late spring or early summer, your garlic plant will start to flower. Let it flower. Once the flower is dead and the leaves have browned one-half to two-thirds of the way down the stem, dig your garlic up. This should happen no later than July.

Once you have harvested your garlic, you can store it and save some for growing garlic from cloves again in a few months.

The mystery of how to grow garlic in warmer climates is not really a mystery at all. With the right varieties and the right planting schedule, you too can be growing garlic in the garden.

source by: http://www.gardeningknowhow.com/edible/herbs/garlic/how-to-grow-garlic-in-warmer-climates.htm

Soil Care for Organic Gardening

SOILS


What’s the most essential element needed for healthy plants, lawns and landscapes? Deep, rich organic soil. But we haven’t met anyone who’s started with the perfect spot of earth right away.

Busting up clay, building up sand, and tweaking to get the pH level that plants adore takes time and preparation. Since each patch of ground is unique, there are no quick and simple answers. But we know what really works, using only natural amendments that hold on to nutrients and water.

Start from the bottom up


Build on a strong foundation. With excellent air flow, water retention and storehouse of minerals underground, you’ll see dense, complex root growth that will help your plants withstand wind and drought. Your plants won’t have to work hard to find what they need.

Feed your plants at the roots – right where they need it. By adding amendments like compost, greensand or kelp meal directly into the soil, energy can be channeled into strong growth.

Ditch chemical fertilizers that are more likely to be washed into groundwater and local streams than help your plants. Instead, choose ingredients that come from the earth, packed full of vital micronutrients that will stick around long after the first rain of the season.

Check your pH. There’s an acid-basic sweet spot that allows plants to access all the nutrition they can find. A simple test will show if your plot is in that range, and we can help suggest amendments if it needs improvement.

If you’re looking for the fastest ticket to a lush garden, start at ground level. You’ll produce healthy, disease-resistant plants year after year.

Effective Weed Control Tips for Organic Gardener

If you were to track every hour spent in your garden, you would probably find that you do an inordinate amount of weeding. And while the first few weeks of tearing up these intruders can prove mildly satisfying, the chore soon wears thin. Even more maddening—you are just six simple strategies away from your garden not needing weeds anymore.
What’s that? A garden needs weeds? Weeds are nature’s healing remedy for sites that are in a wounded, plantless state, but weeds and gardeners have different ideas of what makes for a good recovery. Armed with a better understanding of weeds and the strategies outlined here, you can win every future skirmish, giving you more time to enjoy your well-groomed garden.

Six Tips for Effective Weed Control

Proven methods for controlling weeds in your garden


1. LET SLEEPING WEEDS LIE
Every square inch of your garden contains weed seeds, but only those in the top inch or two of soil get enough light to trigger germination. Digging and cultivating brings hidden weed seeds to the surface, so assume weed seeds are there ready to erupt, like ants from an upset anthill, every time you open a patch of ground. Dig only when you need to and immediately salve the disturbed spot with plants or mulch. In lawns, minimize soil disturbance by using a sharp knife with a narrow blade to slice through the roots of dandelions and other lawn weeds to sever their feed source rather than digging them out. Keep in mind that weed seeds can remain dormant for a long, long time.

2. MULCH, MULCH, MULCH
Mulch benefits plants by keeping the soil cool and moist and depriving weeds of light. Organic mulches, in particular, can actually host crickets and carabid beetles, which seek out and devour thousands of weed seeds.
Some light passes through chunky mulches, and often you will discover—too late—that the mulch you used was laced with weed seeds. It’s important to replenish the mulch as needed to keep it about 2 inches deep (more than 3 inches deep can deprive soil of oxygen). In any case, you can set weeds way back by covering the soil’s surface with a light-blocking sheet of cardboard, newspaper, or biode­gradable fabric and then spreading prettier mulch over it.
If you choose to use this method on seldom-dug areas, such as the root zones of shrubs and trees, opt for tough landscape fabric for the light-blocking bottom sheet. There is a catch, however: As soon as enough organic matter accumulates on the landscape fabric, weed seeds dropped by birds or carried in on the wind will start to grow. For the bottom layer of fabric to be effective, these must be pulled before they sink their roots through and into the ground.

3. WEED WHEN THE WEEDING’S GOOD

The old saying “Pull when wet; hoe when dry” is wise advice when facing down weeds. After a drenching rain, stage a rewarding weeding session by equipping yourself with gloves, a sitting pad, and a trug or tarp for collecting the corpses. As you head out the door, slip an old table fork into your back pocket because there’s nothing better for twisting out tendrils of henbit or chickweed. When going after bigger thugs, use a fishtail weeder to pry up taprooted weeds, like dandelion or dock.
Under dry conditions, weeds sliced off just below the soil line promptly shrivel up and die, especially if your hoe has a sharp edge. In mulched beds, use an old steak knife to sever weeds from their roots, then patch any open spaces left in the mulch.

4. LOP OFF THEIR HEADS
When you can’t remove weeds, the next best thing is to chop off their heads. With annual weeds, dead­heading buys you a few weeks of time before the weed “seed rain” begins. Cutting back the tops of perennial weeds, like bindweed, reduces reseeding and forces them to use up food reserves and exhaust their supply of root buds, thus limiting their spread.
You will need pruning loppers to take down towers of ragweed or poke, or you can step up to a string trimmer equipped with a blade attachment to cut prickly thistles or brambles down to nubs. No matter which method you choose, chopping down weeds before they go to seed will help keep them from spreading.

5. MIND THE GAPS BETWEEN PLANTS

Close plant spacing chokes out emerging weeds by shading the soil between plants. You can prevent weed-friendly gaps from the get-go by designing with mass plantings or in drifts of closely spaced plants rather than with polka dots of widely scattered ones. You can usually shave off about 25 percent from the recommended spacing.
Most spacing recommendations, however, are based on the assumption that adjoining plants will barely touch when they reach mature size, so stick with the guidelines when working with plants that are prone to foliar diseases, such as bee balms (Monarda didyma and cvs., USDA Hardiness Zones 4–9) and phloxes (Phlox paniculata and cvs., Zones 4–8).


6. WATER THE PLANTS YOU WANT, NOT THE WEEDS YOU'VE GOT
Put drought on your side by depriving weeds of water. Placing drip or soaker hoses beneath mulch efficiently irrigates plants while leaving nearby weeds thirsty. In most climates, depriving weeds of water reduces weed-seed germination by 50 to 70 percent. Watch out, though, for the appearance of deeply rooted perennial weeds, such as bindweed and nutsedge, in areas that are kept moist. They can take off in a flash when given the benefits of drip irrigation.
Beyond these strategies, enriching your soil with organic matter every chance you get can move your garden along down the weed-free path. Soil scientists aren’t sure how it works, but fewer weed seeds germinate in soil that contains fresh infusions of good compost or organic matter. One theory makes elegantly simple sense: When soil is healthy and well fed, weed seeds sense that they are out of a job and are less likely to appear.


Organic Farming Concept and Development


Organic farming system in India is not new and is being followed from ancient time. It is a method of farming system which primarily aimed at cultivating the land and raising crops in such a way, as to keep the soil alive and in good health by use of organic wastes (crop, animal and farm wastes, aquatic wastes) and other biological materials along with beneficial microbes (biofertilizers) to release nutrients to crops for increased sustainable production in an eco friendly pollution free environment.


As per the definition of the United States Department of Agriculture (USDA) study team on organic farming “organic farming is a system which avoids or largely excludes the use of synthetic inputs (such as fertilizers, pesticides, hormones, feed additives etc) and to the maximum extent feasible rely upon crop rotations, crop residues, animal manures, off-farm organic waste, mineral grade rock additives and biological system of nutrient mobilization and plant protection”.


FAO suggested that “Organic agriculture is a unique production management system which promotes and enhances agro-ecosystem health, including biodiversity, biological cycles and soil biological activity, and this is accomplished by using on-farm agronomic, biological and mechanical methods in exclusion of all synthetic off-farm inputs”.


Need of organic farming


With the increase in population our compulsion would be not only to stabilize agricultural production but to increase it further in sustainable manner. The scientists have realized that the ‘Green Revolution’ with high input use has reached a plateau and is now sustained with diminishing return of falling dividends. Thus, a natural balance needs to be maintained at all cost for existence of life and property. The obvious choice for that would be more relevant in the present era, when these agrochemicals which are produced from fossil fuel and are not renewable and are diminishing in availability. It may also cost heavily on our foreign exchange in future.


The key characteristics of organic farming include


  • Protecting the long term fertility of soils by maintaining organic matter levels, encouraging soil biological activity, and careful mechanical intervention.
  • Providing crop nutrients indirectly using relatively insoluble nutrient sources which are made available to the plant by the action of soil micro-organisms.
  • Nitrogen self-sufficiency through the use of legumes and biological nitrogen fixation, as well as effective recycling of organic materials including crop residues and livestock manures.
  • Weed, disease and pest control relying primarily on crop rotations, natural predators, diversity, organic manuring, resistant varieties and limited (preferably minimal) thermal, biological and chemical intervention.
  • The extensive management of livestock, paying full regard to their evolutionary adaptations, behavioural needs and animal welfare issues with respect to nutrition, housing, health, breeding and rearing.
  • Careful attention to the impact of the farming system on the wider environment and the conservation of wildlife and natural habitats.


Fertilize Your Organic Garden


Organic fertilizers generally come from plants, animals, or minerals. Soil organisms break down the material into nutrients that plants can use. Some organic fertilizers contain significant amounts of only one of the major nutrients, such as phosphorus in bone meal, but they often have trace amounts of many other beneficial nutrients. In addition, some gardeners add organic material that improves soil structure and supports soil microorganisms, which helps make nutrients available more quickly, especially in warm weather when they are more active. As a general rule, organic fertilizers release about half their nutrients in the first season and continue to feed the soil over subsequent years.


Examples of organic fertilizers:


Plant fertilizer - sea kelp (seaweed), alfalfa meal, corn gluten meal and cottonseed meal. 


Green manure - living cover crop plants turned into the soil.


Natural fertilizer from animals - Whether by land, by air, or by sea, animals, fish, and birds all   provide organic fertilizers that can help plants grow. Most animal-based fertilizers provide lots of nitrogen, which plants need for leafy growth.


Mined natural fertilizer - Rocks decompose slowly into soil, releasing minerals gradually over a period of years. Organic gardeners use many different minerals to increase the fertility of their soils, but it's a long-term proposition. Some take months or years to fully break down into nutrient forms that plants can use, so one application may last a long time. 


How To Get Started - The best way to evaluate your own situation is to start with a  soil test. 

source by: https://www.groworganic.com/fertilizers/organic-fertilizer.html