Showing posts with label organic gardening tips. Show all posts

Saturday, November 28, 2015

15 Common Gardening Mistakes Everyone Makes

We gardeners seem to prefer learning the hard way. In spite of all the gardening books we browse through, and the classes we attend, mistakes are invariably made.  Here’s a sample of the ones many have made and regretted.

Not preparing the beds
Most of us have made this mistake, some out of ignorance, and others due to sheer laziness. When the little seeds and seedling go into the damp earth in spring, it seems the tiny planting holes we make with our fingers or a small hand shovel are room enough for them. But the soil soon dries out and becomes rock hard. If the roots of the young plants cannot penetrate into the soil, you’ll end up with stunted plants.

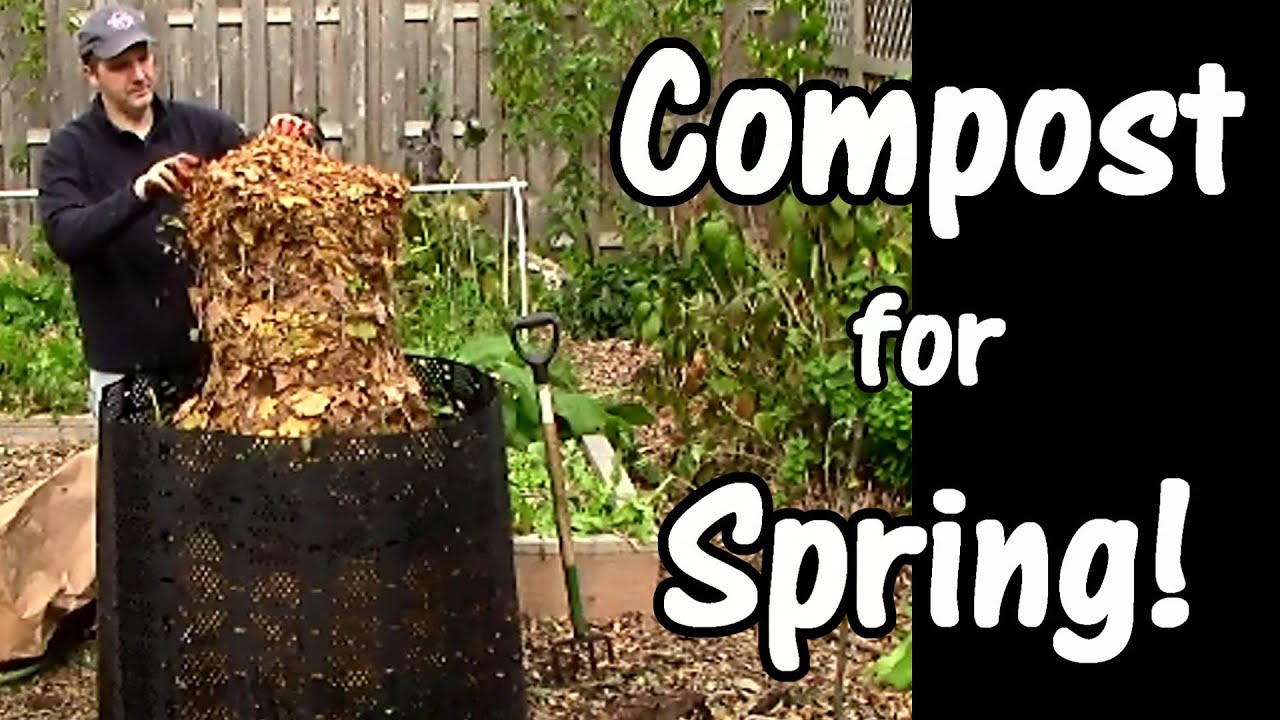
Digging and double digging the garden beds and adding in plenty of compost and leaf mold makes the soil loose enough for good root run. And this backbreaking work has to be done before you plant things. Making raised beds is another option if you don’t want to dig deep.  


Leaving out soil amendment
We tend to forget that soil is like a living organism, always changing and evolving.  Soil conditions can fluctuate with the amount of rainfall, soil runoff and lack of drainage. Some plants deplete certain soil nutrients more than the others. Heavy rains can leach away the limestone you recently added to raise the pH of your broccoli bed.  

It pays to check the soil for pH level and mineral profile every growing season and make necessary amendments a few weeks before planting time. Then test again to make sure things are perfect for the plants that are getting ready to go in.

Organic matter has a modulating effect on soil chemistry, so the more humus your soil has, the lesser the chemical fluctuations. Add plenty of compost and cured manure to your vegetable beds. Good soil is particularly important for your veggies garden since you need healthy plants that produce high-quality food.

Overwatering

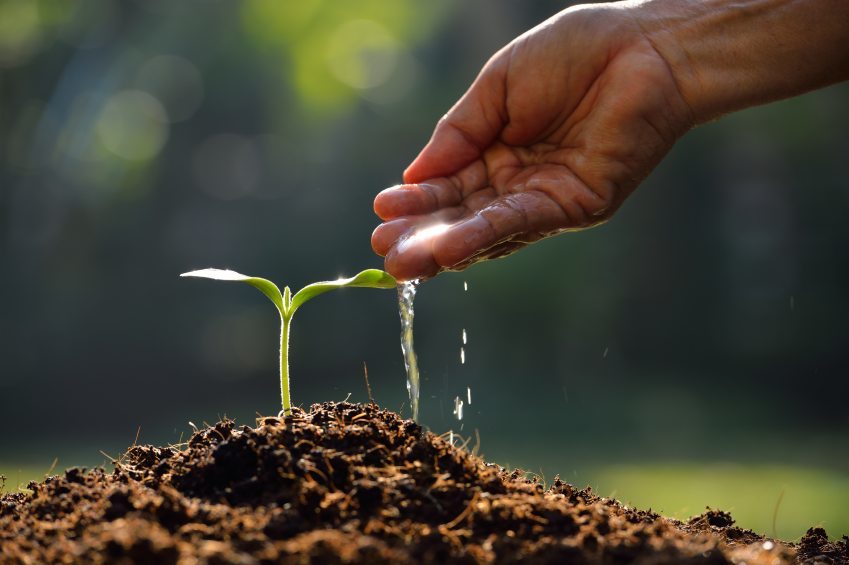
Overwatering is like killing with too much love. Most over enthusiastic gardeners are guilty of this crime. Frequent watering may be necessary until seedlings and cuttings get established. But once they have developed a good root system, water them at regular intervals.

The roots of most plants hate sitting in water. Like every other plant tissue, roots need to breathe. They literally drown if all the air pockets in the soil are filled with water all the time. Even when the top soil looks dry, the lower layers could be soaking wet.

Frequently watered plants remain tender, and wilt very easily in the sun. When the interval between subsequent watering is gradually increased, plants toughen up and learn to be survivors.  However, too much water stress can decrease the yield of some vegetables.

Shallow watering
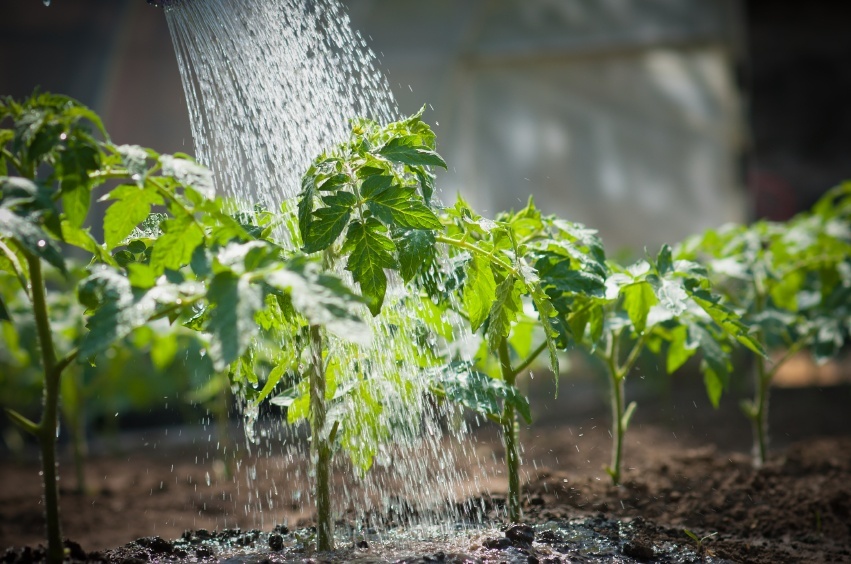
This is another watering mistake committed by those who water their plants with a handheld garden hose. You spray the top growth, washing down the dust on the leaves and giving the entire plant a nice shower. Satisfied, you move on unmindful of the fact that the roots have got very little water. When you see the plants looking rather tired in the afternoon sun, you may give them another quick shower.

Plants drink water through their roots. Wilted crowns do recover rapidly when they are sprayed with water, but that is because it helps cut down the transpiration rate. Shallow watering results in shallow root run. Plants become dependent on frequent watering. They become prone to toppling over and wilting quickly since their roots have not grown deep into the soil to anchor them and to draw water from the reservoirs in the lower layers of soil.

Cut on the frequency of watering, but water the plants deeply every time. Drip irrigation or a leaky hose watering system ensures deep watering. They help save water too.

Planting sun lovers in shade
We all know plants have this unique ability to make food in their leaves with just sunlight, water and air. But sometimes we plant a tomato variety guaranteed to be a prolific bearer close to a tree. We may be overjoyed at the luxurious growth, only to be disappointed by the low yield. The poor plant was making a lot of leaves to maximize food production, but it just wasn’t enough.

There are some woodland plants that have evolved to survive in shady spots, but if you plant sun-loving plants there, they just will not thrive. Tomatoes and most other veggies do best in areas where they can get uninterrupted sun throughout the day. If you mainly have a shady garden, you cannot hope to grow a lot of vegetables other than some greens. Clear out an area for your vegetable patch.

Planting out of season
It is hard to believe seasons have such a hold on plants. Many of us probably have planted seeds or cuttings at the wrong time of the year and watch them put out a bit of growth in the beginning and then quit. Seasons are not much of an issue in tropical areas as long as the young plants are given plenty of water. But it is quite another story up north.

Planting out tender seedling too early in spring leaves them at the mercy of late frosts. Delay a bit, and you may miss the chance to get vigorous growth and yield before the rising temperatures play spoilsport. Cool season veggies and summer flowers have to be planted at their respective times.

Beware of end-of-season bargain offers by mail-order companies. By the time the order reaches you, it might be too late to plant them. Some seeds are viable for only a short period, so preserving them for the next season may not be a good idea. Follow the gardening calendar of your area and listen to the advice of local gardeners for best results.

Not pruning your bushes and trees
Pruning is hard work, but going lax on this seasonal task is one mistake new gardeners make. With bushes grown for ornamental purposes, the prized shape and structure are soon lost.

The yield of fruit trees and berry bushes practically depends on meticulous pruning. Left unpruned, the unnecessary branches and suckers zap them of all the energy that should have been directed towards flowering and fruit setting. Some fruits grow only on new growth, so unless you prompt the plant to put out new shoots by hard pruning every year, you will be left without much fruit in the next season.

When you plant an ornamental/fruit tree or shrub, take pains to learn the right pruning technique. It is even more important than watering and fertilizing schedules.  

Hard pruning at the wrong time
Have you ever pruned a hydrangea bush real hard in fall because it looked nearly dead? You have probably removed all the dormant flower buds that would have bloomed the following year. Some plants bear flowers on old branches while others put out new flowering branches after pruning. You should first learn about the flowering pattern of your bush and schedule the pruning accordingly.

Since pruning instigates new growth in most plants, those that bear flowers and fruits late in the growing season should be pruned once they have gone into dormancy. Early pruning will make them put out tender shoots that will suffer frost damage.

Spring flowering trees and bushes can be pruned immediately after they have finished the show so that they get a long window to develop new growth before the growing season is over. Maintain a pruning calendar for the plants in your garden to avoid mistakes.

Using weed killers on a wrong day
You sprayed the herbicide on a patch of lawn overgrown with weeds, but the next day you find the nearby flower beds decimated. There are selective herbicides that kill only the dicot weeds in the lawn and spare the grass. But the spray was carried by the wind to the dicots growing happily in the flower beds too.

Another mistake is using these chemicals when there’s any danger of rains. The runoff water will carry them off to wreak damage elsewhere. Chemical herbicides are best avoided, but if you do use them in your garden, choose sunny and windless days.


Planting invasive plants
Almost every gardener has fallen in love with a beautiful plant on his/her travels and has brought it home, not realizing they are considered noxious weeds in that area. Just because you don’t see certain plants in your locality, it doesn’t mean they are not invasive. Probably years of eradication measures and campaigning or strict rules have managed to keep them out, and you could have just undone all that.

Whether you gather seeds or plants from the wild or get planting materials from a distant friend or relative, or order them online, check beforehand if they are invasive in your area or not. Once established, it is hard work, or nearly impossible, to root them out.  

Planting single self-sterile plants
Have you purchased a berry bush or a young tree and waited for years only to be disappointed when none of the flowers turned into fruit? If you have planted a self-sterile variety, you have two options: get rid of it or plant another one and wait for years again.  

Some blueberry plants need two of the same type for successful pollination. But it takes two different types of apple trees to give you fruit. Not only that, they should have the same blooming time. Some apple trees produce sterile pollen, so you will need a third tree in the premises. It is a complex matter.

Some plums and pears are only partially self-sterile, and they manage to grow a few fruit. But they do much better in company. If you don’t want to try your luck, choose your plants with the help of knowledgeable suppliers, or stick to self-fertile varieties.

Scaring away pollinators with pesticides
Being too handy with pesticides is a big mistake overzealous gardener make. We are not talking about contaminating the earth here, although it is a great concern. If you find too few vegetables and fruits after meticulously watering and fertilizing your plants and keeping off pests and weeds with frequent spraying, you could have scared off the pollinators.  

It is hard to watch pests chomping away on your well-tended veggies, but remember that all the critters visiting your vegetable patch are not your enemies. You need insect pollinators to ensure a good crop.   

Ordering too many bulbs

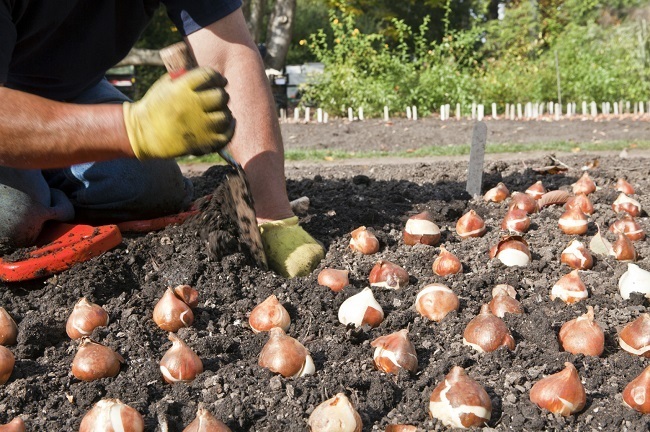
When the catalogs offer such great steals, which self-respecting gardener can resist the temptation to stock up on the bulbs? When your bulb planting encroaches into your annual beds and all unimaginable places in the garden, you have overdone it, yet again. We are not mentioning the unplanted ones here.

Bulbs promise a welcome burst of color as the seasons change, but you will agree that the flower show is all too short. You need your annuals and perennials for year long enjoyment. To let you in on a secret: you can buy gardener friends by giving away some of your bulbs. They are a delightful lot, you know.

Planting trees too close to the house
You had zeroed in on the perfect tree for your landscape after extensive research, but now you are contemplating cutting it down. You had made the mistake of planting it too close to the house. The fully grown tree is literally a threat to your safety, let alone other problems like too much shade, constant dampness and fallen leaves and flowers making a mess around the house.   

It is never a good idea to plant tall trees close to your home. You may think you can keep it under control with regular pruning, but who will control the roots beneath the soil? They can spread and swell, making the foundation of the house unstable.

Planting the same vegetable in the same place year after year
We tend to designate certain areas in our garden to vegetables and ornamentals, but repeatedly growing tomatoes or greens in the same area is a mistake many of us have come to regret.

One reason is the pests and diseases that take hold of the area. Many of the fungal blights, rusts and spots are host specific. Their spores remain in the soil and affect the next batch of plants. Most caterpillars, beetles and borers and some nematodes also show a definite preference for certain plants or plant groups. Their eggs and larvae are in the soil awaiting their host plants. Plant rotation breaks their lifecycle.

Care should be taken to avoid different plants of the same family together, or one after another, in the same spot. They may have common pests. For example, cabbage worms feast on cauliflowers, broccoli, collard greens and turnips. Tomatoes, eggplants and potatoes that belong to the same family are affected by many common fungal diseases.    

Another reason why crop rotation is important is that different plants have different nutritional requirements. The soil fertility is seriously depleted when nitrogen or potash loving plants continue to be grown in the same place. The yield of subsequent crops is greatly affected and the need for fertilizers increases.

Planting leguminous vegetables or cover crops help fix nitrogen in the soil. It can be utilized by leafy vegetable that require a lot of it.

It is fun to share your gardening mistakes with fellow gardeners because everybody makes them, and no one is sitting in judgment. If there’s a chance of learning from someone else’s mistakes, that’s a bonus.   
More importantly, some garden weeds posses extraordinary health benefits. Make sure you know what they are and don’t kill these off!


Friday, November 20, 2015

Easy Composting Tips For Your Organic Garden

Having an organic vegetable garden means freedom from the chemical laden produce that is usually found in supermarkets these days. If you are against the practice of big commercial food growers which is using chemically laden fertilizers and pesticides, organically growing your own is the best act of defiance you can take.

Composting is an integral part of organic gardening. Composting enriches or improves the soil by providing nutrients to it that plants need in order to thrive. When composting, it is essential to note that only the right natural materials should be used.
source : google

The following are easy composting tips for organic gardens…

Make a compost pit. Choose a shady area in your backyard and dig a hole approximately 4 feet wide by 5 feet deep. Secure your compost pit with a fence, this will ensure no one will fall in it and also to keep scavenging pests away.
Collect your kitchen refuse. Biodegradable kitchen waste can be included in your compost. Collect kitchen refuse like vegetables, fruit peelings, spent coffee grounds, and spoiled food (no meat) into a garbage bag to throw later in your compost pit.
source: google
Gather leaves when cleaning your yard and throw these as well in the pit.
When the pit is almost full, cover it with soil. Allow the compost to decompose for 2-3 months.
Turn your compost at least once a week. The frequency in which you turn your compost would depend on the method you choose to compost. If you compost by batches, turn every few days for the first 2 weeks then move to just once a week for the next 4-8 weeks. If you have an add-as-you-go pile, you should turn every few times scraps are added in order to get the undigested material into the inside of the pile. Air is necessary in the decomposition process and turning the compost pile helps aerate it and speed up the process.
There are things you can compost like algae, seaweed and lake moss, banana peels, cardboard, clover, cotton bur, cowpeas, egg shells. And there are also materials you should never add to your compost pile like cat droppings, lime, meat, oils and grease. [For the complete list of materials you can and cannot compost, click here.]
When the compost is ready, you can mix it to the soil as a natural fertilizer and start growing organic vegetables and fruits. The decayed materials in the compost will enrich the soil, ensuring lush plant growths.

So these are some easy composting tips to get you started with your organic garden.


Tuesday, November 17, 2015

7 Secret Tricks to Get the Most Produce Out Of Your Vegetable Garden

Do not let a limited garden space hamper your dreams of abundant harvest. Having a small area to work with does not mean you cannot harvest more crops. In reality it is doable! You just need to work a little bit more to make this dream turn into a reality. Here’s how to do it.

7 Secret Tricks to Get the Most Produce Out Of Your Vegetable Garden


1. Build Up Your Soil

If you want to extract more yields from your vegetable garden, the first thing you need to do is to build up your garden soil. The best thing to accomplish this task is to add organic matter to your soil. Aged animal manure and organic compost will do the trick. After you have finished adding organic matters into your soil, the next thing to do is to make raised beds. Raised beds can yield you up to four times more than just planting and growing crops in rows. Using raised beds will maximize the space in your garden resulting in much greater yield.


2. Round Out Your Beds

It is not enough to just make raised beds in your garden. The shape of your beds will also play an important part. Since raised beds are more space efficient, the best thing to do to your raised beds is to make sure that the top of the bed is rounded to form an arc. This may seem not a big deal but once you start planting and growing your crops, you will see a big difference in terms of planting space and crop yield during harvest.


3. Spacing is the key

The way you plant your crops is also a big factor to get the maximum amount of crop yield from each of your garden beds. Instead of planting your crops in square patterns or rows, why not plant them like forming a triangle. Planting in a triangle pattern can add about 12 percent more plants to each of your garden beds.


4. Use Vertical Gardening

If you have a small garden space to work with, you can still plant more crops by going vertical. Plant vine crop vegetables such as tomatoes, beans, squash, melons, peas, and other vegetable crops that grows vertically. Just make sure to support your vertical garden by using trellis, fences, stakes, or anything that can be used in vertical gardening.


5. Mix It Up

If you really want to maximize your garden space, then, interplanting crops is a great way to do it. Plant corn together with pole beans and squash in the same area in your garden. The corn will serve as a support once your pole beans start to climb while the squash can grow freely on the ground and serves as protection to competing weeds.


6. Plant in Succession

Growing more than one crop in the same space in the garden is also a great way to get the most out of your garden. During the planting season, do some succession planting in your garden. This way you can harvest up to about four different crops from a single area. You can do this by planting different crops that grows and matures fast. For example, If you plant and harvest lettuce, you can follow it up by planting corn, then, followed by some fast maturing greens. This is done within the same planting season.


7. Stretch Your Season

You can stretch your planting season by growing crops that matures fast. Lettuce, kale, turnips, and tomatoes are just some of the examples. You can also stretch your planting season by making sure your soil is warm enough and have a good air circulation even during the colder months. Do this by applying mulch around your plants, putting row covers, or using cold frames to protect the crops in your garden.

source by : http://freshorganicgardening.com/7-secret-tricks-to-get-the-most-produce-out-of-your-vegetable-garden/6/

Friday, November 13, 2015

How to grow flowers the organic way


Flowers are often referred to as ‘ornamentals’. But they don’t just look good, they can be an essential part of your organic growing. They attract beneficial insects such as pollinators or aphid eaters, they can be used in companion planting in your veg patch – and some you can even eat (allow your herbs to flower and both you and the pollinators will enjoy the blooms!)

You won't need to use artificial fertilisers to help them thrive – as with all organic growing it is a matter of getting the soil well prepared. Choose plants that are suited to your soil type and locality, and you can enjoy their visual beauty and colour all year round.

On this page you can find out How to Create a Wildflower Meadow (see below). We also offer you a a list of flowers for beneficial insects - such as bees and butterflies. For edible flowers, such as borage, nasturtium and marigold, see How to Grow.

As always, the best place to start is by downloading the Organic Gardening Guidelines. These are a code of practice, designed with a helpful traffic light system, to help you on your organic growing journey - whether you are a complete beginner, want to convert to organic, or be reminded of good organic practice.

Preparing your growing area
Wherever and whatever you are growing, you need to prepare the soil first. Soil provides life for your plants, and in turn you need to provide nutrients for your soil. See Managing your soil. On a new allotment or garden, your first battle might be with weeds. These compete with other plants for light, nutrition and water, so you need to clear them before you start growing. If your growing area is large, decide which part of the ground you want to use to start growing immediately, and which part you can leave for later. We suggest the following way to help you prepare the ground the organic way - without chemicals and weed killers.

For immediate use, dig the ground over to take out tough and woody weeds like docks, thistles, nettles and brambles, removing as much root as possible. See FAQs for how to deal with bindweed or brambles. Then add as much compost as you can - one big wheelbarrow, or 5 large buckets, for every 5 square metres of ground. Dig this compost into the top 10 cms of soil, and your bed is ready for planting. If you want to sow seeds, use a rake to break down and gently flatten the topsoil into a fine texture (known as tilth) so the seeds can access soil and water to germinate.

You can take your time preparing the remaining growing area. A light-excluding membrane (which is often made of plastic, and can be bought in rolls in garden centres or on-line) will suppress and eventually kill the weeds. However, it can take up to 6 months to 2 years. (We do not recommend using carpet. Many carpets use harmful chemicals in their construction and moth proofing which can leach into the ground.)

Another way to clear weeds on your new beds is the No Dig method. This uses a thick (over 15cms) mulch of manure or compost, often used in conjunction with a plastic membrane, which not only suppresses the weeds but also feeds the soil. However, persistent weeds such as docks and bindweed will not be eradicated for many years.

If you are growing in containers, prepare your organic growing medium according to the plants you plan to grow. See Container growing.

How to create a Wild Flower Meadow
You don’t need a large meadow to grow wild flowers. A corner of your lawn, a patch between your beds or on the edge of your allotment can all be converted to wild flower growing. However, the important thing is not to enrich the soil. Fertile soils in flower beds, with nutrients such as phosphates, will allow weeds such as nettles and docks to take over. A poor, well-drained, sunny patch is ideal.

Preparation – first dig out perennial weeds. If your soil is nutrient rich, take off the top 20 cms to expose a poorer subsoil. Then prepare a firm, level seedbed a month before you plan to sow. This allows the weed seeds to establish and you to hoe them off!

Sowing – the best time to sow is September, when the soil is still warm, this allows a cold period before germination in the spring. Sow sparingly. It helps to mix the seed thoroughly with sawdust or silver sand, so you can see where you have broadcast it. Then gently rake and firm the surface. Water if conditions are very dry.

Cutting – allow your flowers to set seed before mowing. Spring flowering meadows can be cut from late June onwards, a summer flowering meadow from September onwards. Do not cut the grass too short ie a minimum of 5 cms. Leaving the hay for a couple of weeks allows it to shed its seed, and then it must be removed to keep the soil fertility low.

An elusive, but helpful plant in creating a wildflower meadow, is the attractive annual Yellow rattle. In the past this plant was a serious pest for farmers as it weakens grasses and as a result can reduce hay yields. In a planned wildflower meadow, however, this suppression of grass growth is welcomed. At the end of each growing season as the annual yellow rattle plants die away they leave behind gaps into which new wild flowers can establish.

Wildflower meadow seeds are available from The Organic Gardening Catalogue. Garden Organic members get a discount. Why not become a Garden Organic member? Membership costs as little as £2.75 a month, and you get free or discounted entry to many gardens throughout the UK. Phone 02476 303517 or email membership@gardenorganic.org.uk.


Wednesday, September 16, 2015

Garlic Plant in Warmer Climates

How To Grow Garlic In Warmer Climates


Garlic is a bulb and because it is a bulb, most garlic varieties need to have a certain amount of cold weather to form the tasty bulbs we like to eat. For gardeners in warmer climates, this can be a frustrating fact, but not one that needs to keep them from growing garlic in the garden. A little knowledge about garlic and garlic varieties is all it takes to know how to grow garlic successfully in warmer climates.

Garlic Varieties


Gardeners in warmer climates, zones 7-9, will have a difficult time growing garlic in the garden from just any garlic varieties. Most likely you will want to look for some of the gourmet or heirloom cultivars that grow well in warmer weather. These cultivars include:

Creoles
Asiatic
Hardnecks
Marbled Purple Stripe

These cultivars may not be available at your local garden center but can be found online at many reputable online garlic dealers.

How to Plant Garlic


When and how to plant garlic in warmer climates is a bit different than in cooler climates. For one, you can plant the garlic later and for two, you can harvest it sooner. Plan to plant your garlic in late October through early December.

When you plant your garlic, what you will be doing is growing garlic from cloves, so take one clove off the bulb and plant it into the prepared bed. Remember, just like flower bulbs, the pointy end of the clove goes up. You will want to plant the garlic clove about 8 to 10 inches down in the dirt. Space them about 6 to 8 inches apart.


How Does Garlic Grow in the Winter


In warmer climates, you can expect to see growth from your garlic all winter long. This will appear in the form of garlic greens coming from the clove. In cooler climates, the greens do not grow until spring. Don’t worry about the occasional drop in temperature, as garlic and its greens are more than able to handle the cold.

When to Harvest Garlic


In late spring or early summer, your garlic plant will start to flower. Let it flower. Once the flower is dead and the leaves have browned one-half to two-thirds of the way down the stem, dig your garlic up. This should happen no later than July.

Once you have harvested your garlic, you can store it and save some for growing garlic from cloves again in a few months.

The mystery of how to grow garlic in warmer climates is not really a mystery at all. With the right varieties and the right planting schedule, you too can be growing garlic in the garden.

source by: http://www.gardeningknowhow.com/edible/herbs/garlic/how-to-grow-garlic-in-warmer-climates.htm

Soil Care for Organic Gardening

SOILS


What’s the most essential element needed for healthy plants, lawns and landscapes? Deep, rich organic soil. But we haven’t met anyone who’s started with the perfect spot of earth right away.

Busting up clay, building up sand, and tweaking to get the pH level that plants adore takes time and preparation. Since each patch of ground is unique, there are no quick and simple answers. But we know what really works, using only natural amendments that hold on to nutrients and water.

Start from the bottom up


Build on a strong foundation. With excellent air flow, water retention and storehouse of minerals underground, you’ll see dense, complex root growth that will help your plants withstand wind and drought. Your plants won’t have to work hard to find what they need.

Feed your plants at the roots – right where they need it. By adding amendments like compost, greensand or kelp meal directly into the soil, energy can be channeled into strong growth.

Ditch chemical fertilizers that are more likely to be washed into groundwater and local streams than help your plants. Instead, choose ingredients that come from the earth, packed full of vital micronutrients that will stick around long after the first rain of the season.

Check your pH. There’s an acid-basic sweet spot that allows plants to access all the nutrition they can find. A simple test will show if your plot is in that range, and we can help suggest amendments if it needs improvement.

If you’re looking for the fastest ticket to a lush garden, start at ground level. You’ll produce healthy, disease-resistant plants year after year.

Effective Weed Control Tips for Organic Gardener

If you were to track every hour spent in your garden, you would probably find that you do an inordinate amount of weeding. And while the first few weeks of tearing up these intruders can prove mildly satisfying, the chore soon wears thin. Even more maddening—you are just six simple strategies away from your garden not needing weeds anymore.
What’s that? A garden needs weeds? Weeds are nature’s healing remedy for sites that are in a wounded, plantless state, but weeds and gardeners have different ideas of what makes for a good recovery. Armed with a better understanding of weeds and the strategies outlined here, you can win every future skirmish, giving you more time to enjoy your well-groomed garden.

Six Tips for Effective Weed Control

Proven methods for controlling weeds in your garden


1. LET SLEEPING WEEDS LIE
Every square inch of your garden contains weed seeds, but only those in the top inch or two of soil get enough light to trigger germination. Digging and cultivating brings hidden weed seeds to the surface, so assume weed seeds are there ready to erupt, like ants from an upset anthill, every time you open a patch of ground. Dig only when you need to and immediately salve the disturbed spot with plants or mulch. In lawns, minimize soil disturbance by using a sharp knife with a narrow blade to slice through the roots of dandelions and other lawn weeds to sever their feed source rather than digging them out. Keep in mind that weed seeds can remain dormant for a long, long time.

2. MULCH, MULCH, MULCH
Mulch benefits plants by keeping the soil cool and moist and depriving weeds of light. Organic mulches, in particular, can actually host crickets and carabid beetles, which seek out and devour thousands of weed seeds.
Some light passes through chunky mulches, and often you will discover—too late—that the mulch you used was laced with weed seeds. It’s important to replenish the mulch as needed to keep it about 2 inches deep (more than 3 inches deep can deprive soil of oxygen). In any case, you can set weeds way back by covering the soil’s surface with a light-blocking sheet of cardboard, newspaper, or biode­gradable fabric and then spreading prettier mulch over it.
If you choose to use this method on seldom-dug areas, such as the root zones of shrubs and trees, opt for tough landscape fabric for the light-blocking bottom sheet. There is a catch, however: As soon as enough organic matter accumulates on the landscape fabric, weed seeds dropped by birds or carried in on the wind will start to grow. For the bottom layer of fabric to be effective, these must be pulled before they sink their roots through and into the ground.

3. WEED WHEN THE WEEDING’S GOOD

The old saying “Pull when wet; hoe when dry” is wise advice when facing down weeds. After a drenching rain, stage a rewarding weeding session by equipping yourself with gloves, a sitting pad, and a trug or tarp for collecting the corpses. As you head out the door, slip an old table fork into your back pocket because there’s nothing better for twisting out tendrils of henbit or chickweed. When going after bigger thugs, use a fishtail weeder to pry up taprooted weeds, like dandelion or dock.
Under dry conditions, weeds sliced off just below the soil line promptly shrivel up and die, especially if your hoe has a sharp edge. In mulched beds, use an old steak knife to sever weeds from their roots, then patch any open spaces left in the mulch.

4. LOP OFF THEIR HEADS
When you can’t remove weeds, the next best thing is to chop off their heads. With annual weeds, dead­heading buys you a few weeks of time before the weed “seed rain” begins. Cutting back the tops of perennial weeds, like bindweed, reduces reseeding and forces them to use up food reserves and exhaust their supply of root buds, thus limiting their spread.
You will need pruning loppers to take down towers of ragweed or poke, or you can step up to a string trimmer equipped with a blade attachment to cut prickly thistles or brambles down to nubs. No matter which method you choose, chopping down weeds before they go to seed will help keep them from spreading.

5. MIND THE GAPS BETWEEN PLANTS

Close plant spacing chokes out emerging weeds by shading the soil between plants. You can prevent weed-friendly gaps from the get-go by designing with mass plantings or in drifts of closely spaced plants rather than with polka dots of widely scattered ones. You can usually shave off about 25 percent from the recommended spacing.
Most spacing recommendations, however, are based on the assumption that adjoining plants will barely touch when they reach mature size, so stick with the guidelines when working with plants that are prone to foliar diseases, such as bee balms (Monarda didyma and cvs., USDA Hardiness Zones 4–9) and phloxes (Phlox paniculata and cvs., Zones 4–8).


6. WATER THE PLANTS YOU WANT, NOT THE WEEDS YOU'VE GOT
Put drought on your side by depriving weeds of water. Placing drip or soaker hoses beneath mulch efficiently irrigates plants while leaving nearby weeds thirsty. In most climates, depriving weeds of water reduces weed-seed germination by 50 to 70 percent. Watch out, though, for the appearance of deeply rooted perennial weeds, such as bindweed and nutsedge, in areas that are kept moist. They can take off in a flash when given the benefits of drip irrigation.
Beyond these strategies, enriching your soil with organic matter every chance you get can move your garden along down the weed-free path. Soil scientists aren’t sure how it works, but fewer weed seeds germinate in soil that contains fresh infusions of good compost or organic matter. One theory makes elegantly simple sense: When soil is healthy and well fed, weed seeds sense that they are out of a job and are less likely to appear.


Organic Farming Concept and Development


Organic farming system in India is not new and is being followed from ancient time. It is a method of farming system which primarily aimed at cultivating the land and raising crops in such a way, as to keep the soil alive and in good health by use of organic wastes (crop, animal and farm wastes, aquatic wastes) and other biological materials along with beneficial microbes (biofertilizers) to release nutrients to crops for increased sustainable production in an eco friendly pollution free environment.


As per the definition of the United States Department of Agriculture (USDA) study team on organic farming “organic farming is a system which avoids or largely excludes the use of synthetic inputs (such as fertilizers, pesticides, hormones, feed additives etc) and to the maximum extent feasible rely upon crop rotations, crop residues, animal manures, off-farm organic waste, mineral grade rock additives and biological system of nutrient mobilization and plant protection”.


FAO suggested that “Organic agriculture is a unique production management system which promotes and enhances agro-ecosystem health, including biodiversity, biological cycles and soil biological activity, and this is accomplished by using on-farm agronomic, biological and mechanical methods in exclusion of all synthetic off-farm inputs”.


Need of organic farming


With the increase in population our compulsion would be not only to stabilize agricultural production but to increase it further in sustainable manner. The scientists have realized that the ‘Green Revolution’ with high input use has reached a plateau and is now sustained with diminishing return of falling dividends. Thus, a natural balance needs to be maintained at all cost for existence of life and property. The obvious choice for that would be more relevant in the present era, when these agrochemicals which are produced from fossil fuel and are not renewable and are diminishing in availability. It may also cost heavily on our foreign exchange in future.


The key characteristics of organic farming include


  • Protecting the long term fertility of soils by maintaining organic matter levels, encouraging soil biological activity, and careful mechanical intervention.
  • Providing crop nutrients indirectly using relatively insoluble nutrient sources which are made available to the plant by the action of soil micro-organisms.
  • Nitrogen self-sufficiency through the use of legumes and biological nitrogen fixation, as well as effective recycling of organic materials including crop residues and livestock manures.
  • Weed, disease and pest control relying primarily on crop rotations, natural predators, diversity, organic manuring, resistant varieties and limited (preferably minimal) thermal, biological and chemical intervention.
  • The extensive management of livestock, paying full regard to their evolutionary adaptations, behavioural needs and animal welfare issues with respect to nutrition, housing, health, breeding and rearing.
  • Careful attention to the impact of the farming system on the wider environment and the conservation of wildlife and natural habitats.


Fertilize Your Organic Garden


Organic fertilizers generally come from plants, animals, or minerals. Soil organisms break down the material into nutrients that plants can use. Some organic fertilizers contain significant amounts of only one of the major nutrients, such as phosphorus in bone meal, but they often have trace amounts of many other beneficial nutrients. In addition, some gardeners add organic material that improves soil structure and supports soil microorganisms, which helps make nutrients available more quickly, especially in warm weather when they are more active. As a general rule, organic fertilizers release about half their nutrients in the first season and continue to feed the soil over subsequent years.


Examples of organic fertilizers:


Plant fertilizer - sea kelp (seaweed), alfalfa meal, corn gluten meal and cottonseed meal. 


Green manure - living cover crop plants turned into the soil.


Natural fertilizer from animals - Whether by land, by air, or by sea, animals, fish, and birds all   provide organic fertilizers that can help plants grow. Most animal-based fertilizers provide lots of nitrogen, which plants need for leafy growth.


Mined natural fertilizer - Rocks decompose slowly into soil, releasing minerals gradually over a period of years. Organic gardeners use many different minerals to increase the fertility of their soils, but it's a long-term proposition. Some take months or years to fully break down into nutrient forms that plants can use, so one application may last a long time. 


How To Get Started - The best way to evaluate your own situation is to start with a  soil test. 

source by: https://www.groworganic.com/fertilizers/organic-fertilizer.html